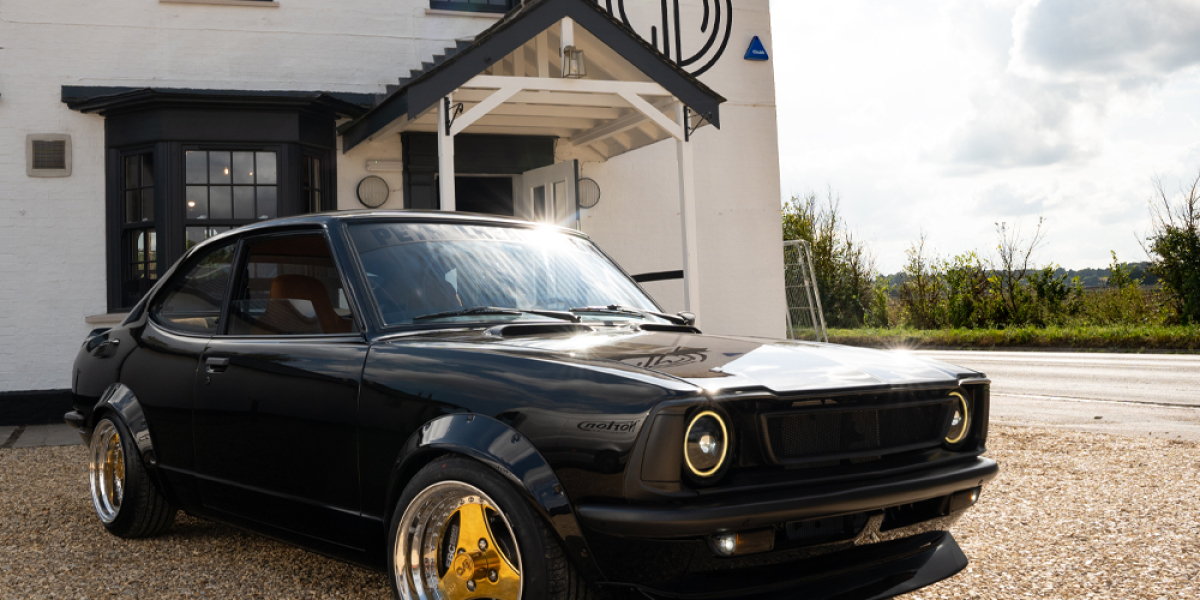
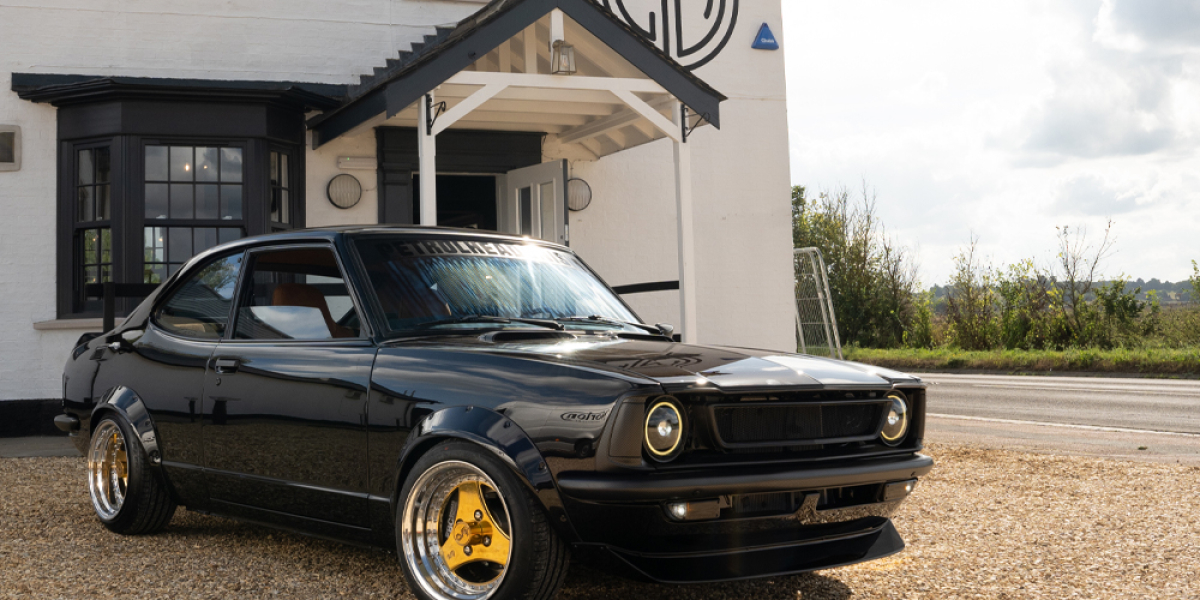
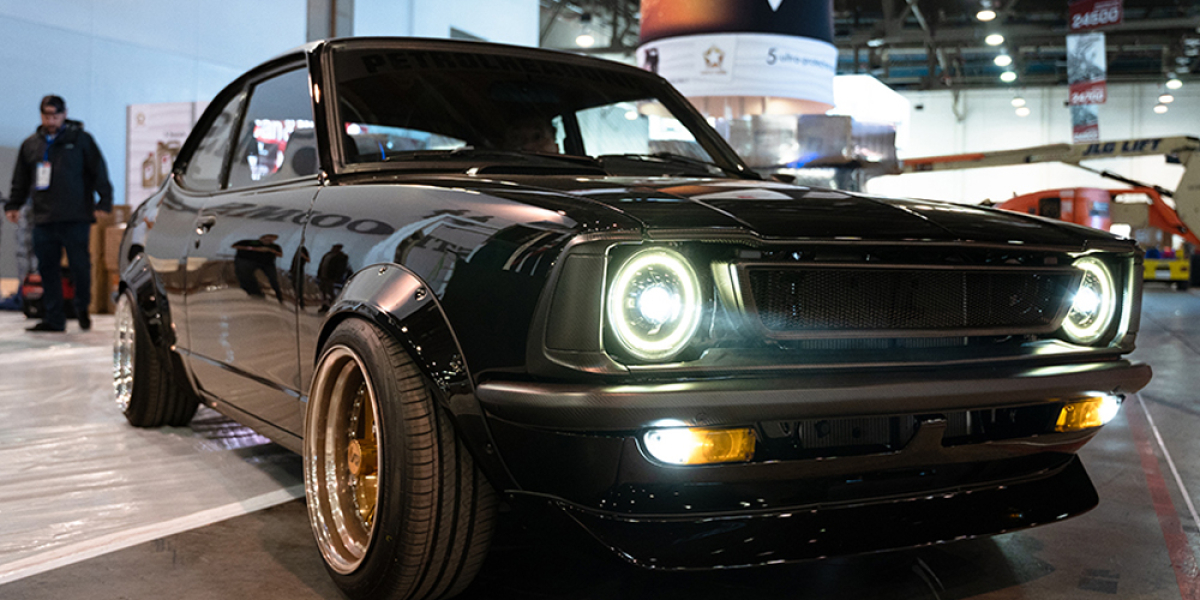
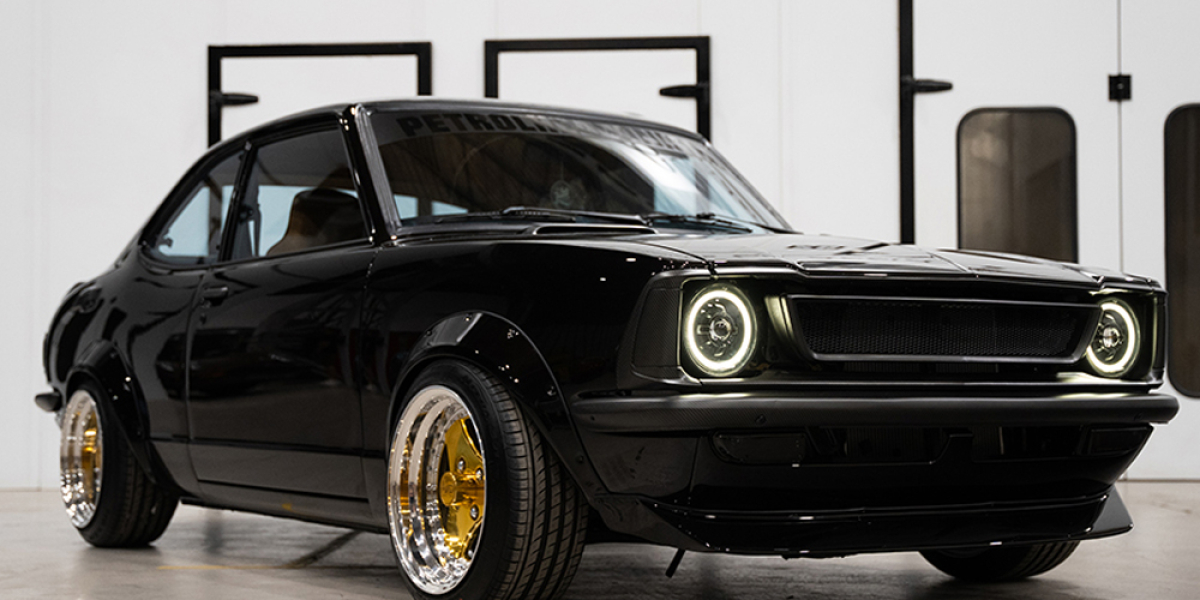
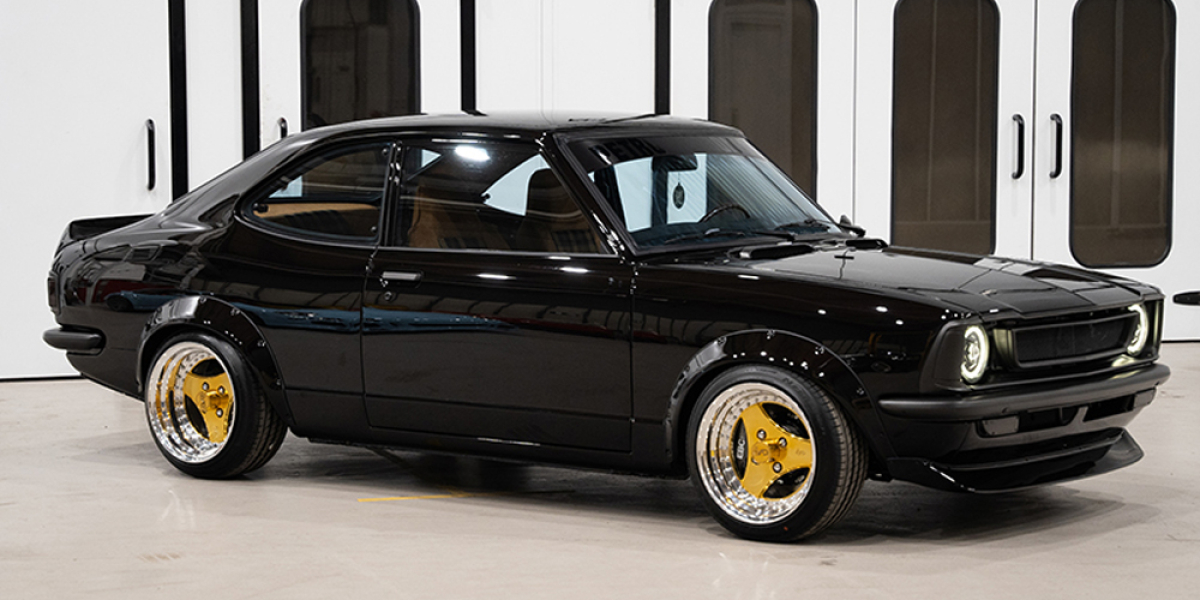
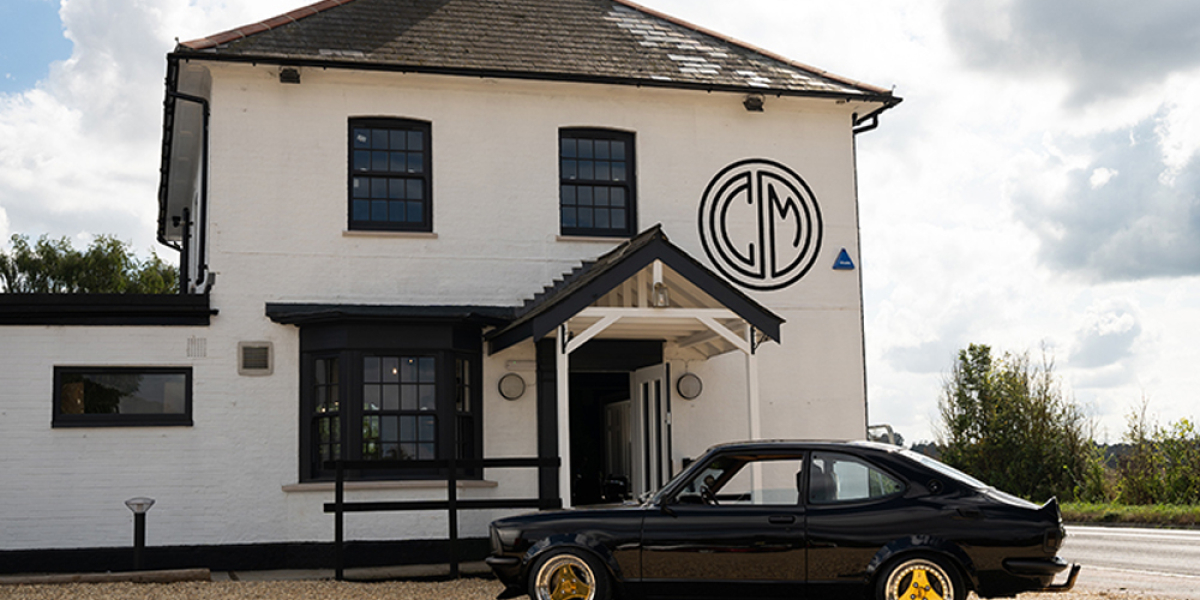
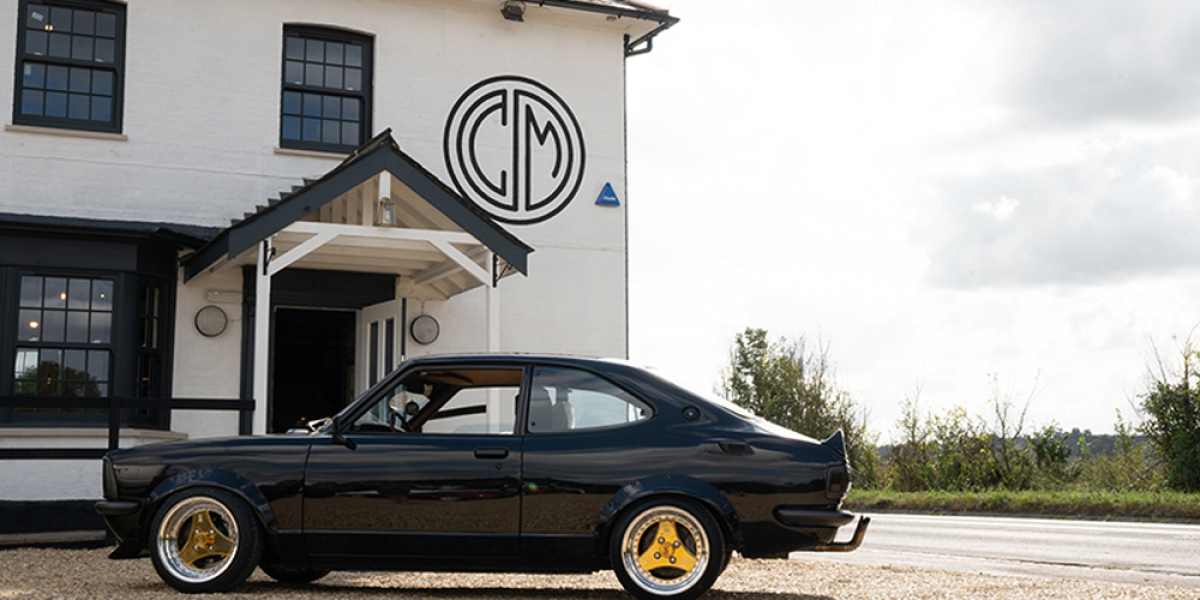
1973 Toyota Corolla KE25 - The SEMA Dream

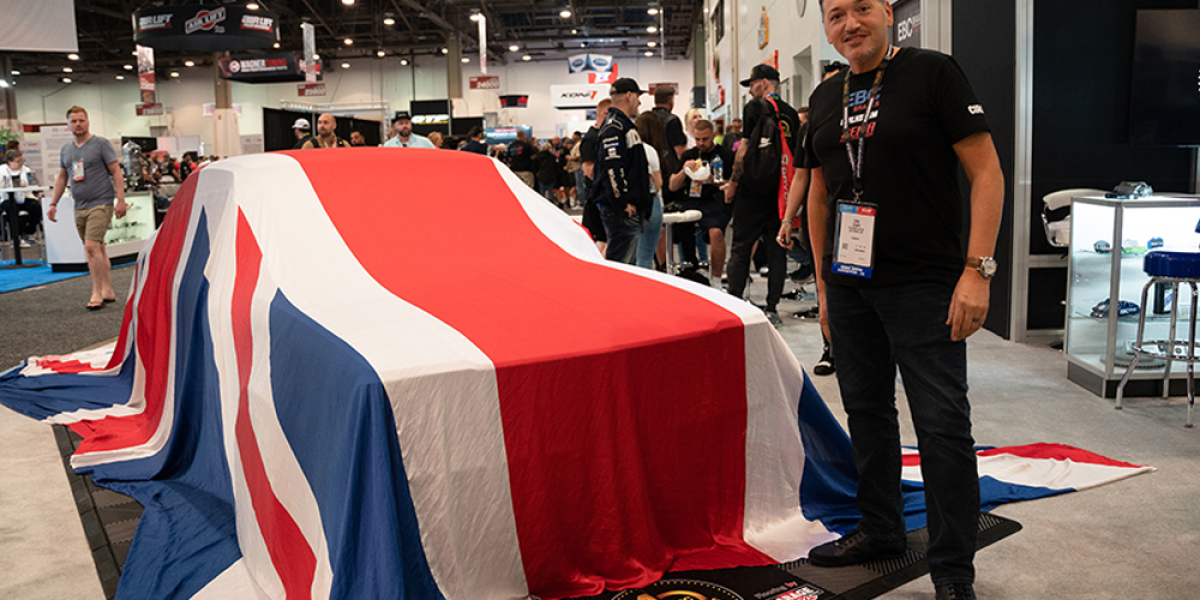
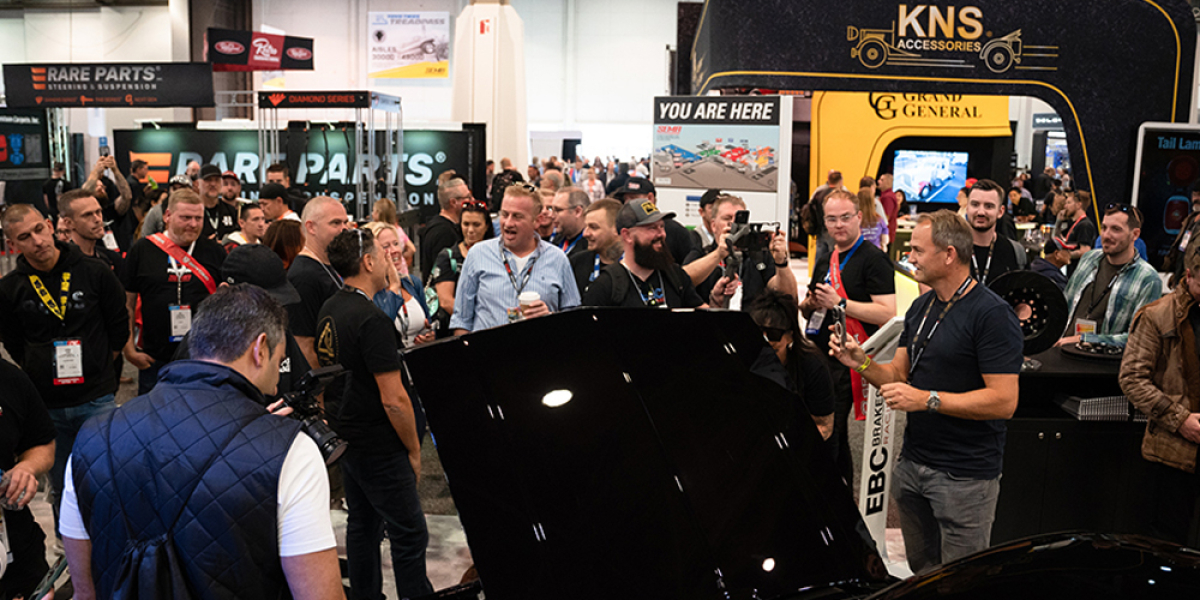
Ciro Ciampi has been a long-time friend of RestoMod and a true petrolhead and he heads up the Petrolheadonism.Club in the UK. He enjoys organizing events and living the ultimate petrolhead lifestyle, which includes driving Lamborghinis and hanging out with fellow car enthusiasts like Richard Rawlings from Gas Monkey. Ciro has quickly built a name and reputation in the motoring world. When Ciro mentioned building a car for SEMA, we knew it would be special.
- Owners: Ciro Ciampi
- Builders Name: Petrolheadonism.Club & DS1 Collection
- Location of the vehicle: Built in Britain, now in Los Angeles
- Year: 1973
- Make: Toyota
- Model: Corolla KE25.
In his own words, he shares his story. Throughout my life, I have owned numerous cars, but my very first build was a restored 1971 VW Beetle. I have always had a passion for expressing myself through my cars and their modifications. During my visits to SEMA over the past few years, and while working alongside our brake partners EBC Brakes, I was inspired to create a car with all our UK partners for SEMA 2023. However, the big question was what to build. We had originally planned to build a Liberty Walk Datsun 240Z, but after a life-changing experience where the car disappeared, I stumbled upon a 1973 Toyota Corolla KE25 that was being restored by Alpha Performance Fabrications.
The KE25 was imported from Finland in 2018. It looked solid and rust-free and was therefore a perfect candidate for our SEMA build! It was sold to us by Alpha Performance Fabrications, and they joined the SEMA project as a build partner for all our fabrication requirements. This project was a great opportunity because of the rarity of this car. My vision of the build was further enhanced by the inspiration of @ponretro on Instagram who supplied the fender and spoiler kit. The clock was ticking, and the SEMA build was on its way.
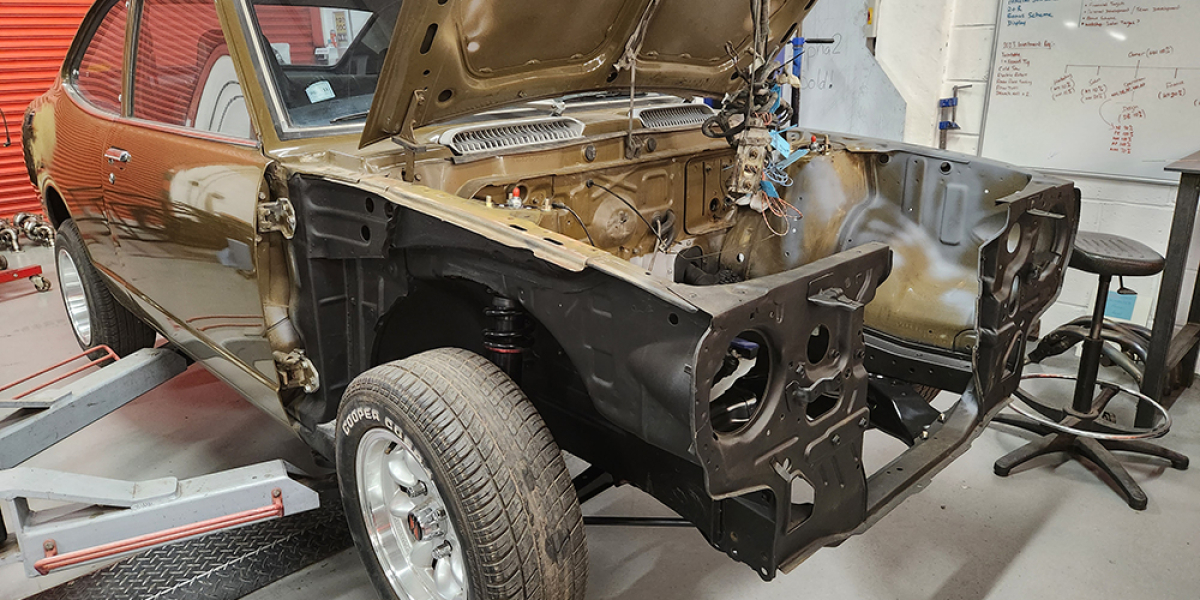
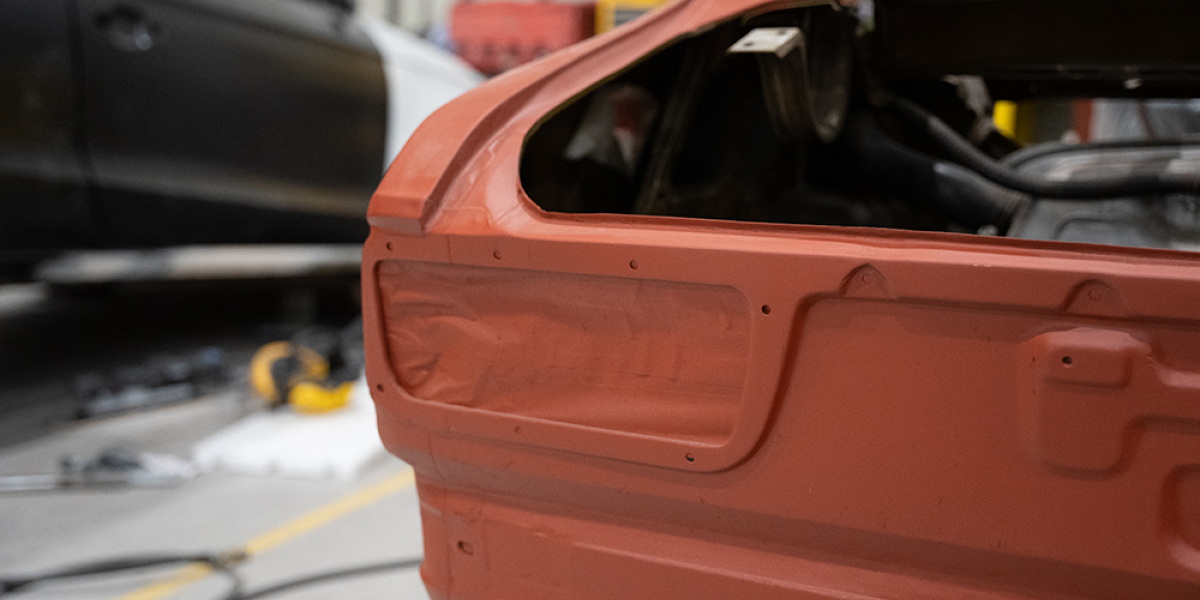
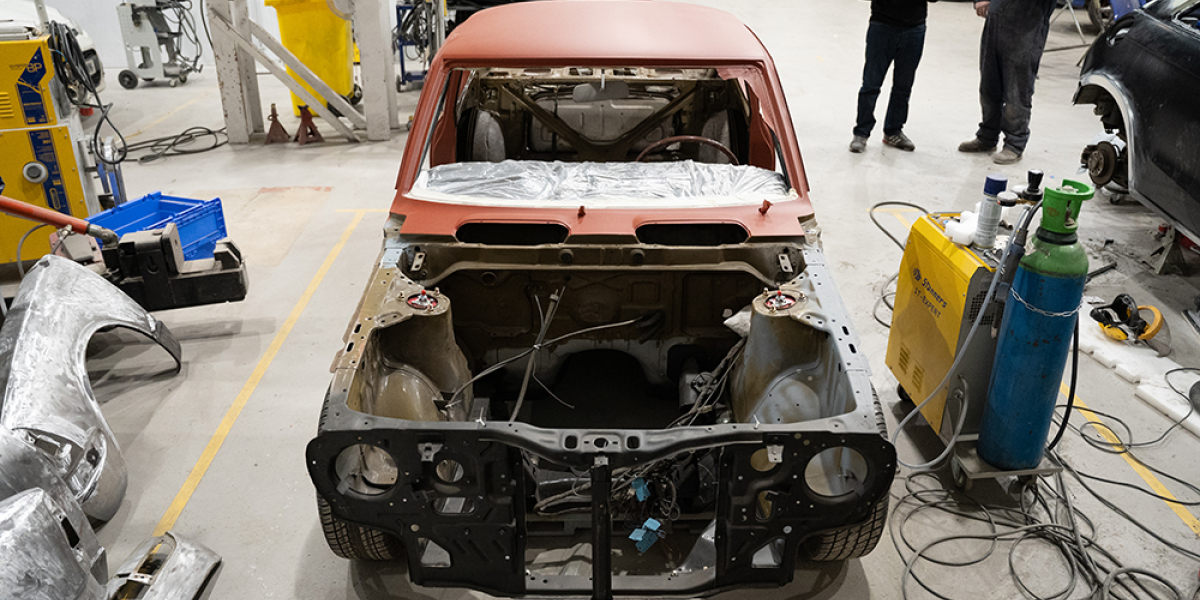
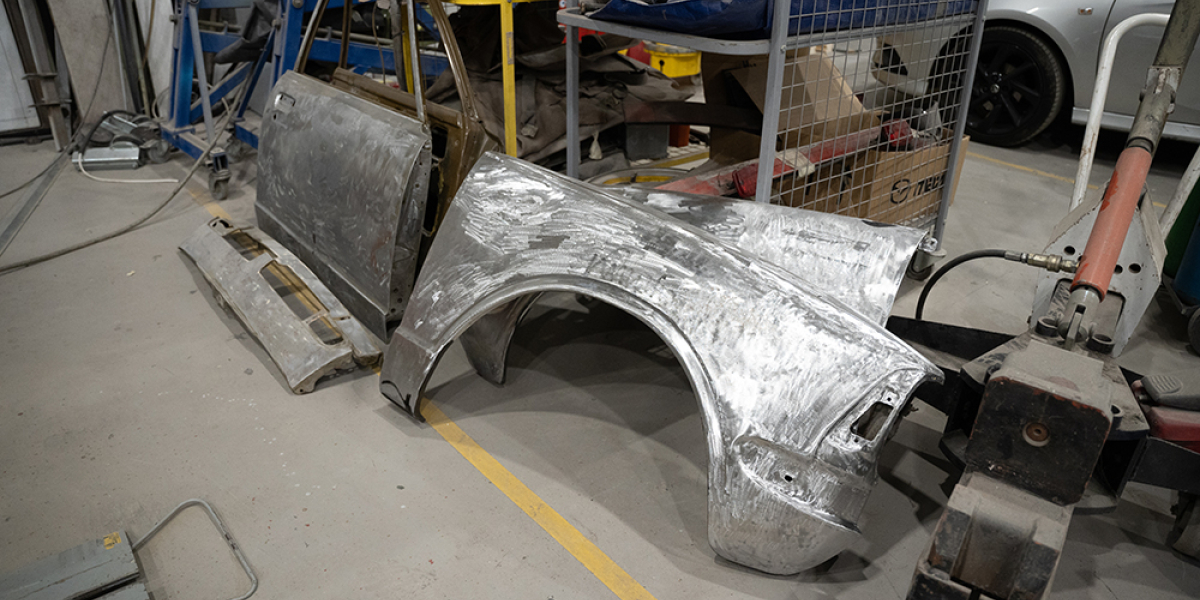
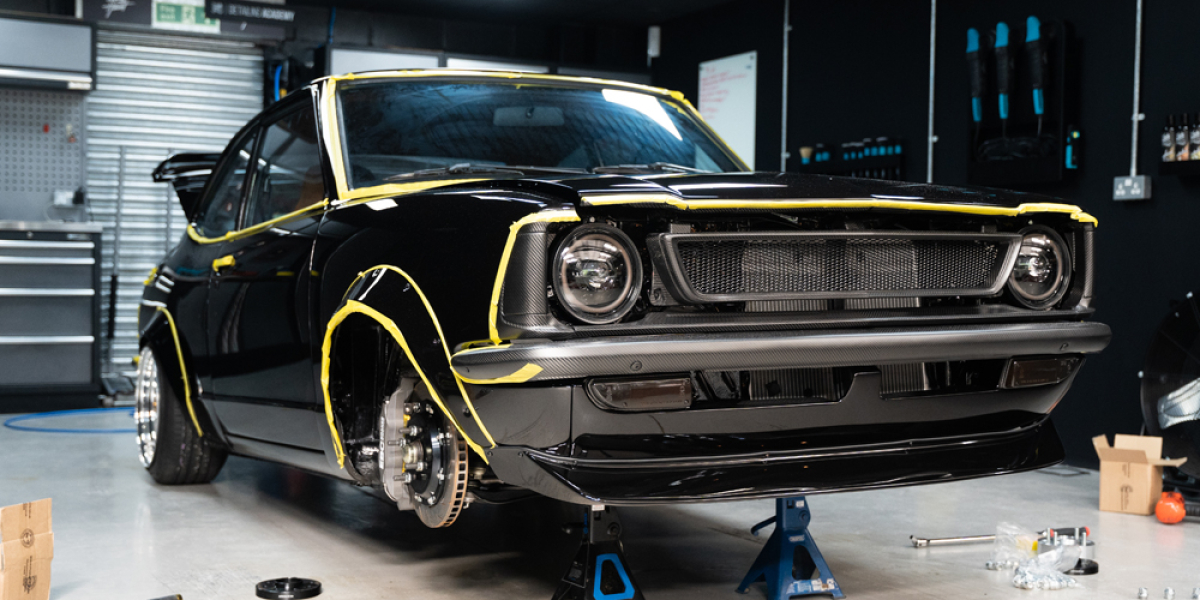
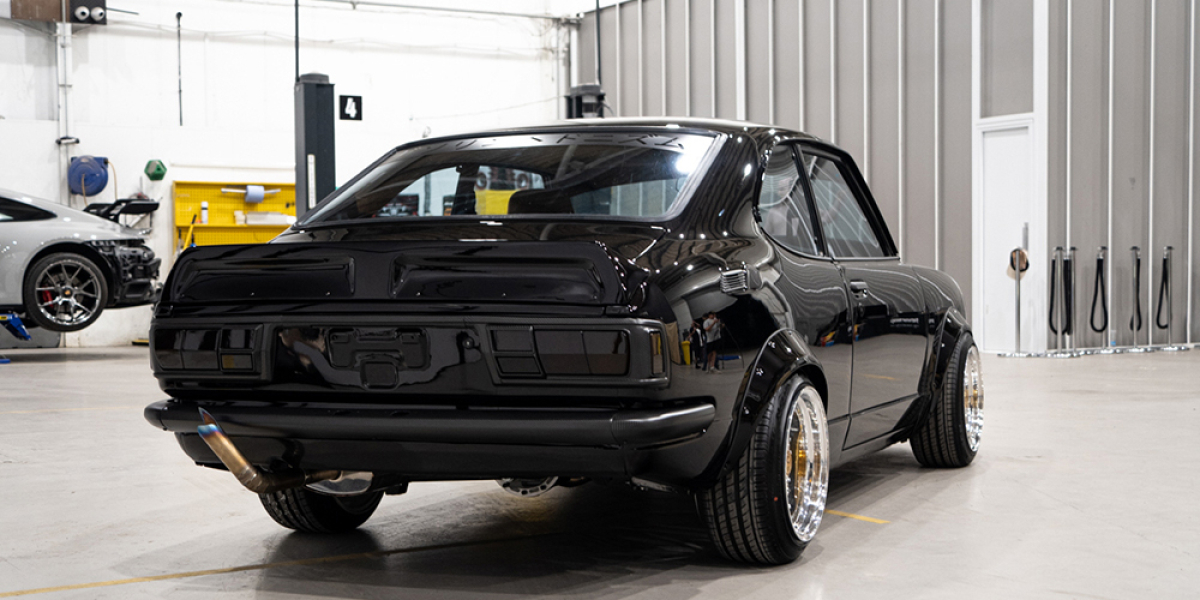
Body Work: The KE25 had a remarkably sturdy chassis and body. However, to make it worthy of SEMA, it had to undergo a complete restoration process. Pennings UK began the strip-down project in January of 2023, starting with a bare metal body preparation. We had the underside of our car sandblasted by Chiltern Sandblasting in Hemel Hempstead. The purpose was to remove all the under-sealants and ensure that we could do a meticulous paint job to present a flawless car. To achieve this, the whole body needed careful preparation.
Therefore, Pennings collaborated with Alpha Performance Fabrications to modify the front and rear suspension setup. halfway through the body prep, we returned the car to Alpha to set up the geometry, fabricate the suspension turrets, and cut out the rear floor to fit the 4 Link Suspension and fully floating Atlas axle. We purchased the body kit from a company based in Thailand.
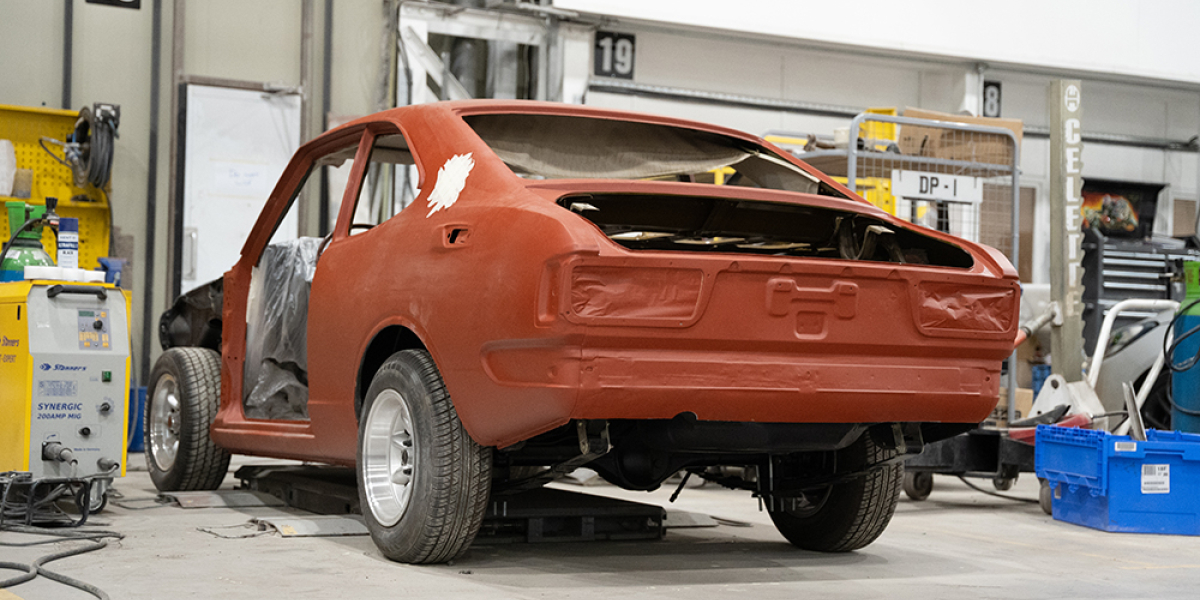
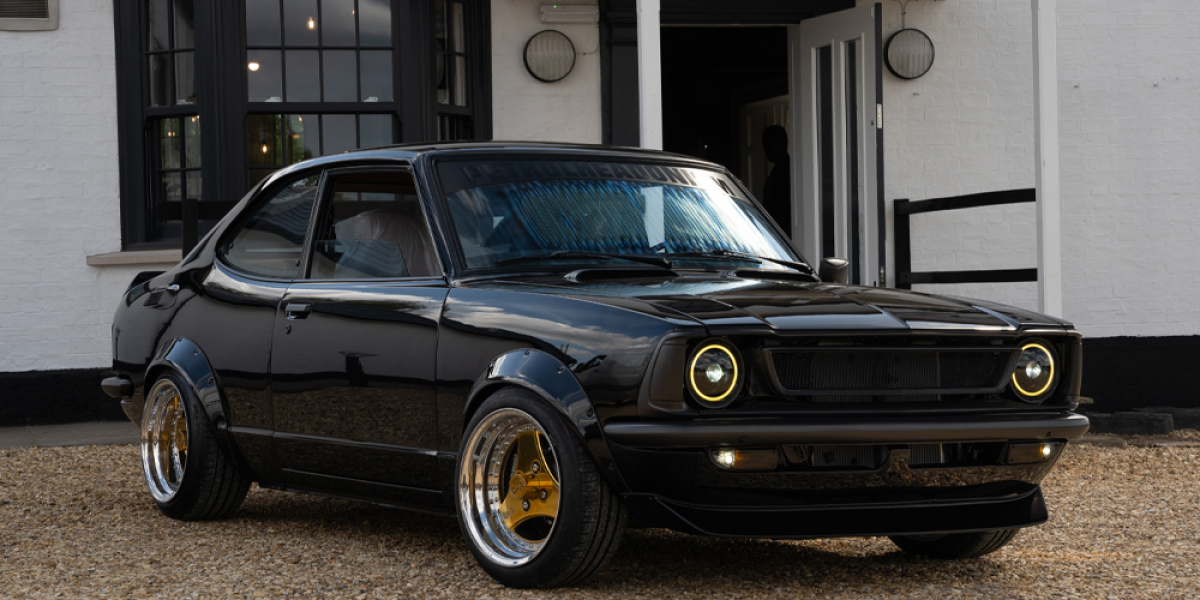
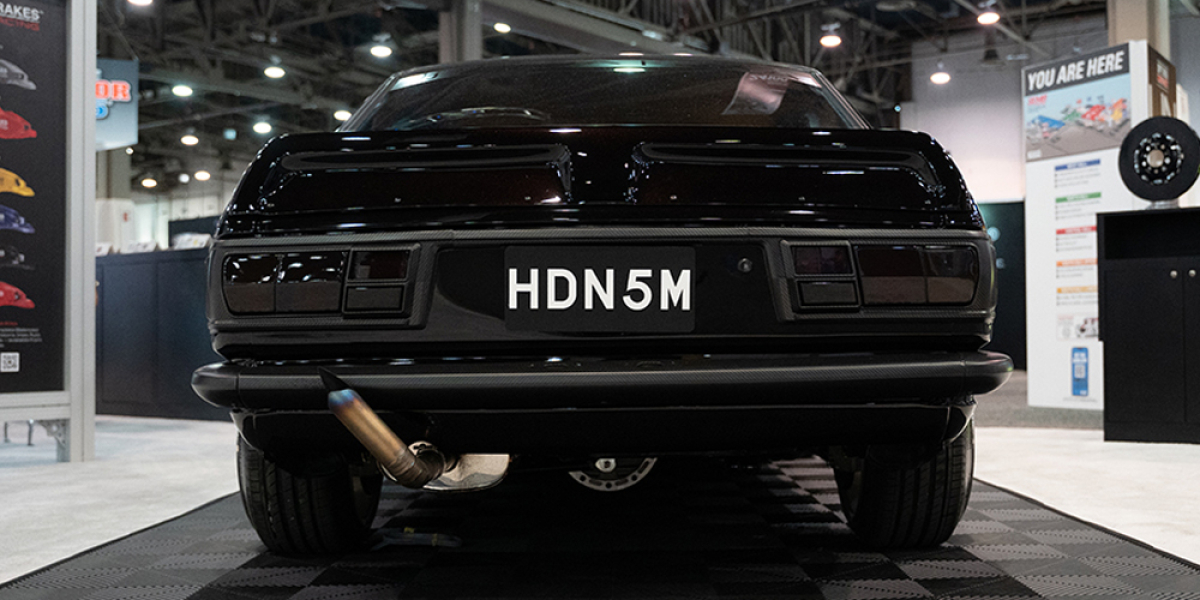
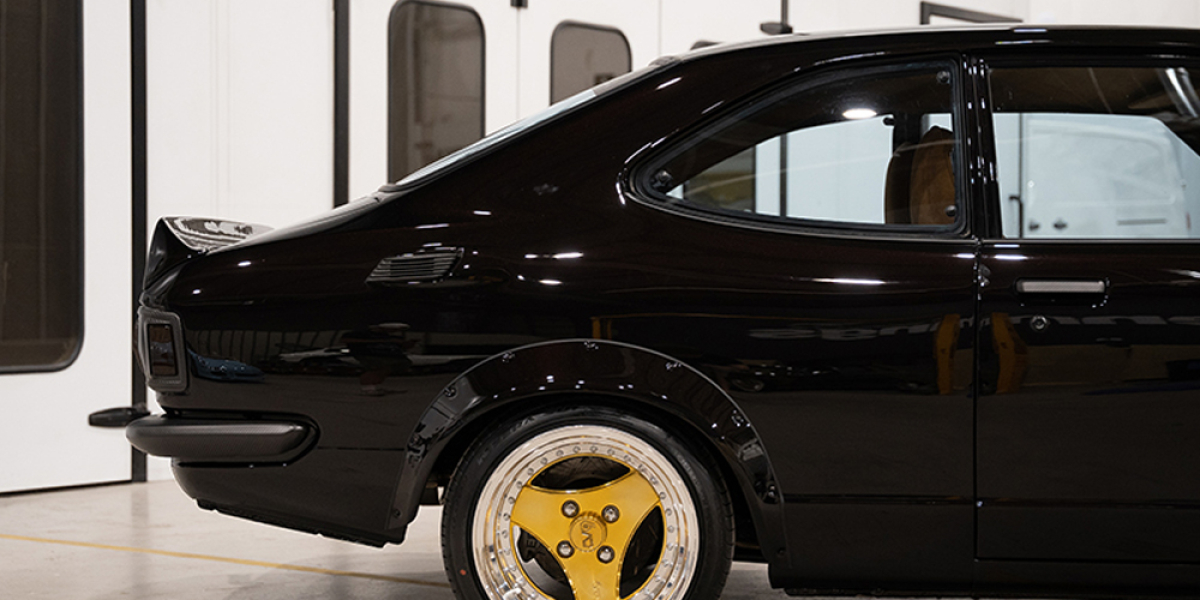
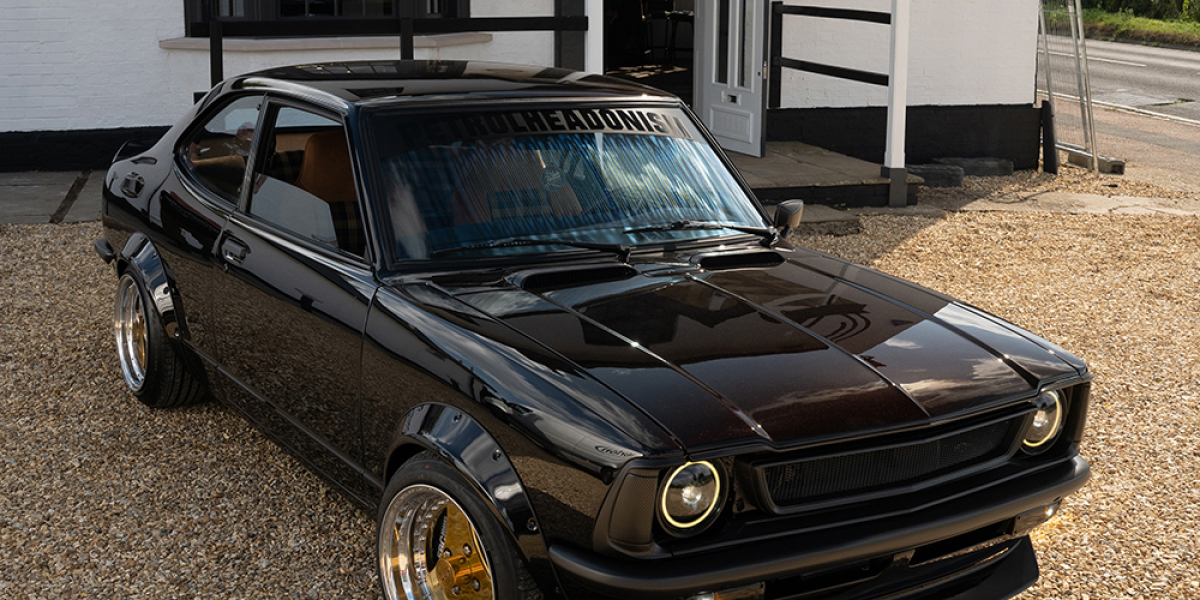
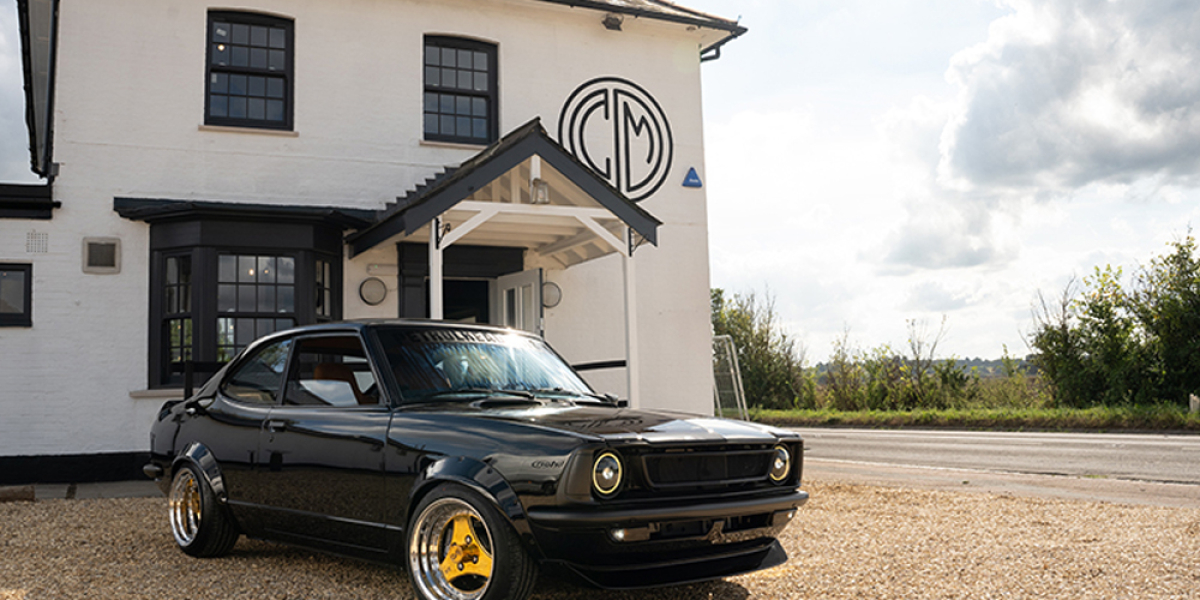
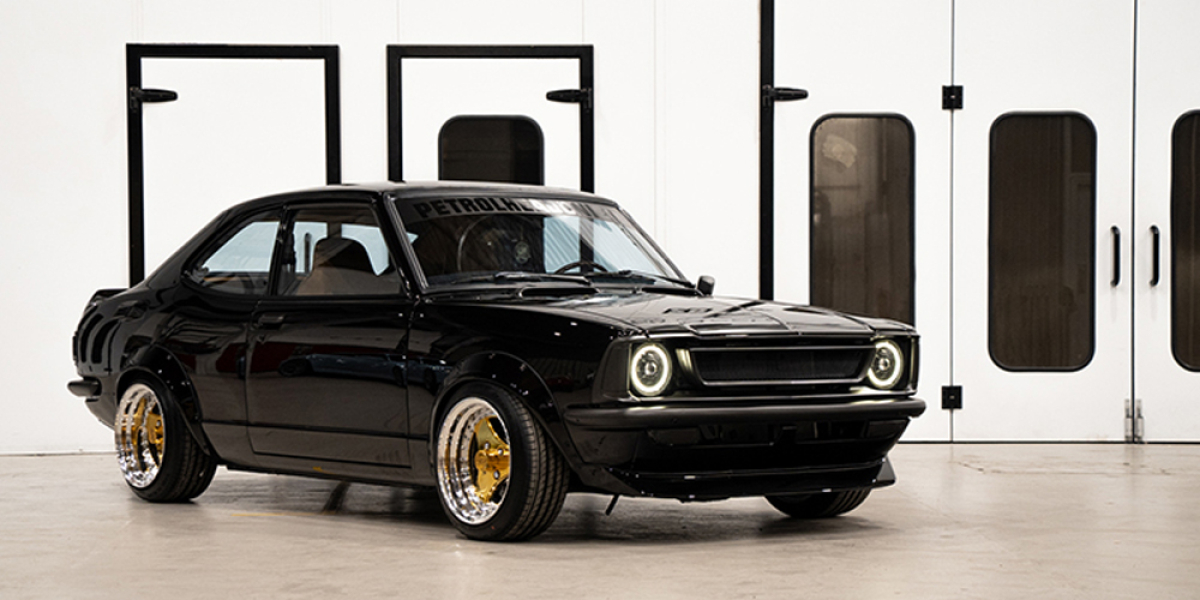
It included a rear spoiler, front splitter, and fender flares. Our goal was to maintain the original look of the KE25 while adding a unique twist that showcases our love of pearl colours and our admiration for Lamborghini. We were inspired by Pon Retro and chose a metallic/pearl finish for our KE25. The original pastel-based colours of the KE25 were replaced with a rare Lamborghini colour code called Nero Granitas, which has flakes of brown and ruby. This colour is so unique that only two Aventadors in the UK come in this shade. We believe that this colour will make our KE25 SEMA Build stand out and be one of a kind.
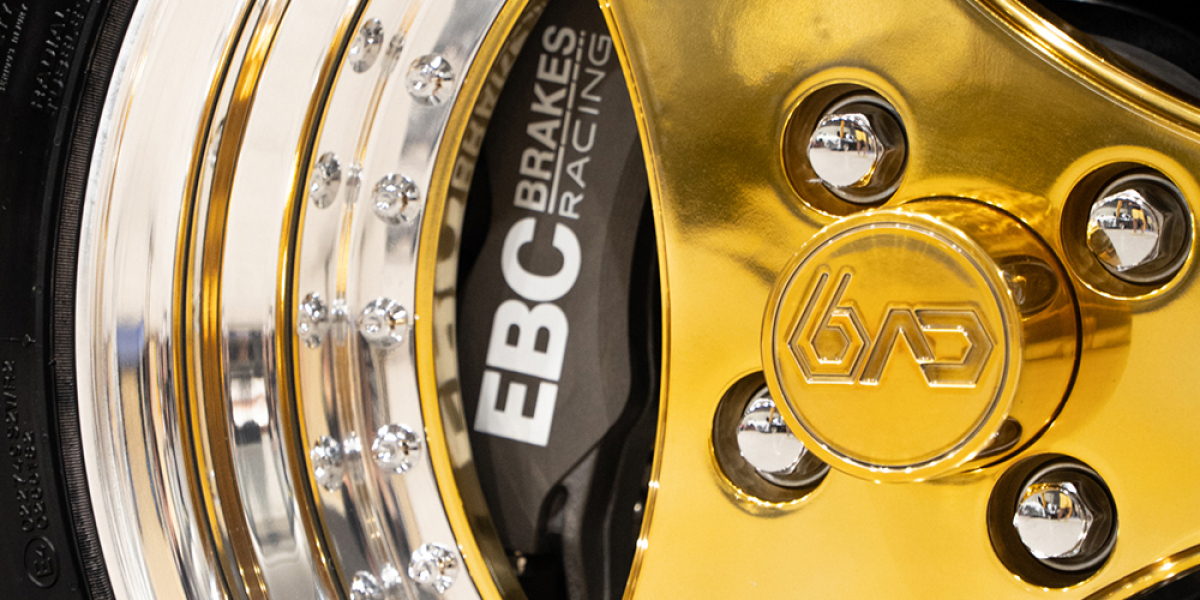
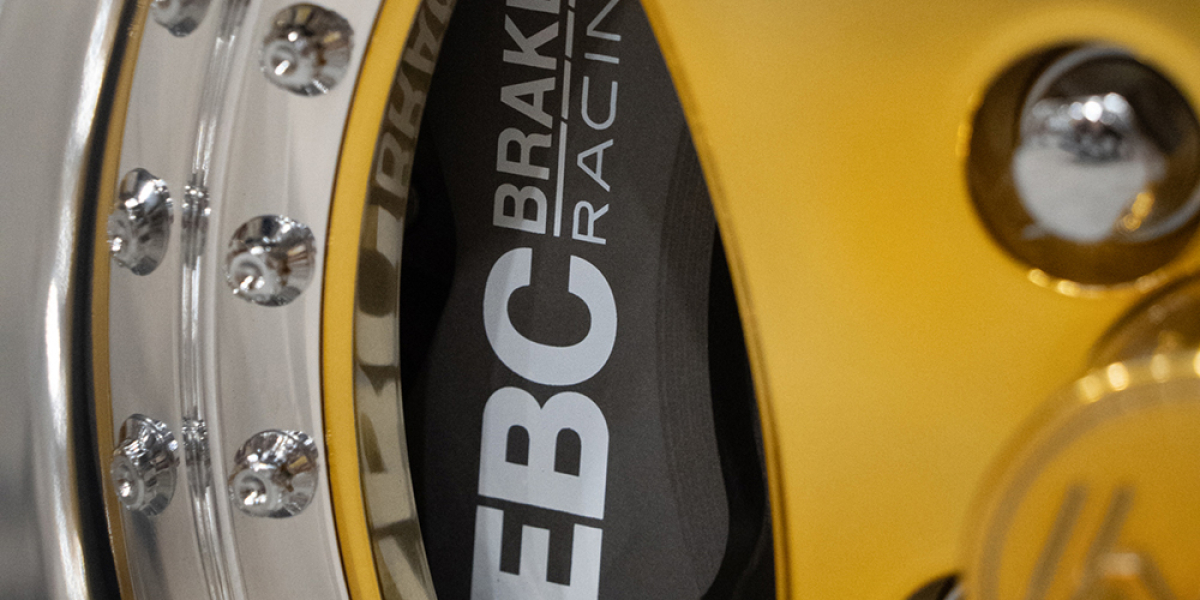
Chassis, Front and Rear Suspension: Our partnership with EBC Brakes proved to be a great decision as it helped us avoid any worries regarding one important aspect of the build. EBC outdid themselves by providing a fully customized Apollo-4 Brake kit for the front. The kit includes EBC Apollo Series 4-piston Calipers in a hard anodized finish, with castellated stainless-steel pistons, stainless steel braided brake lines, 2-piece fully floating rotors, and EBC’s flagship Yellowstuff™ compound brake pads. Stainless steel braided brake lines, grooved rotors, and EBC Yellowstuff™ brake pads were used for the rear 4-piston callipers.
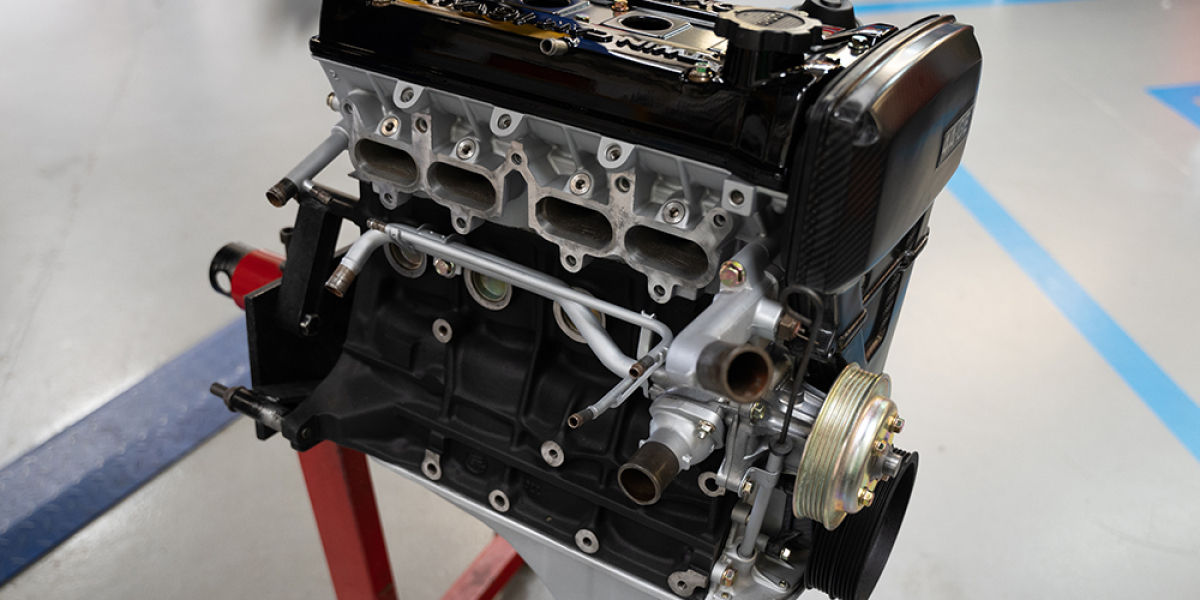
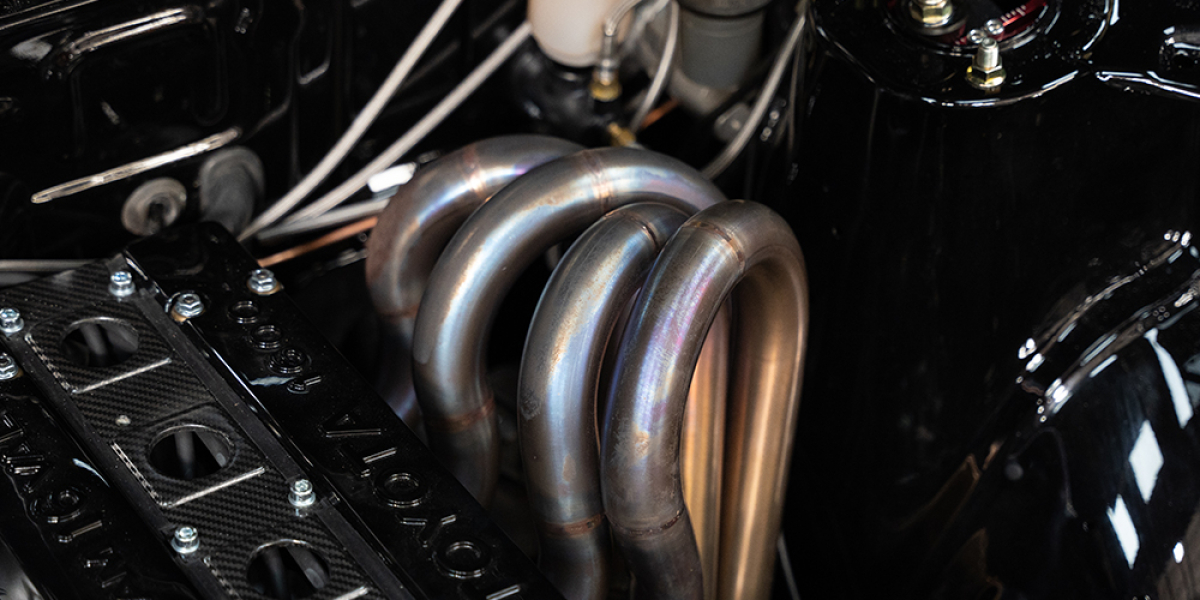
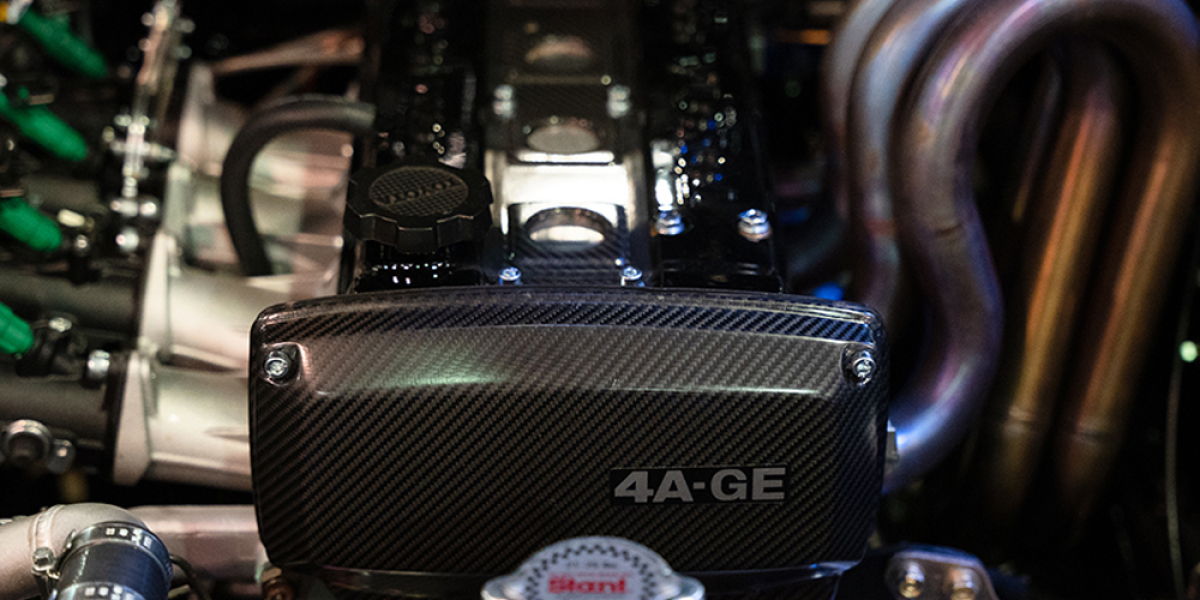
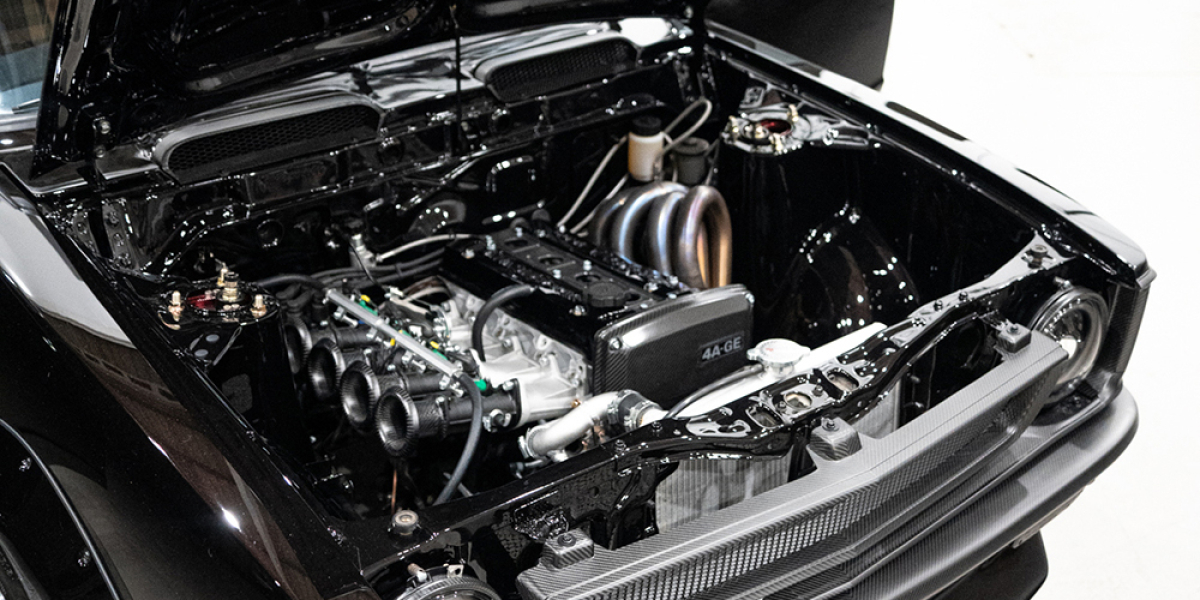
Motor and Gearbox: The 1600cc 4AGE engine and gearbox were sourced from the later AE86 Corolla. Petrolheadonism Performance in Kettering UK performed a full rebuild of the engine. We decided to do a 'mild' performance rebuild with all new engine components and to flow port the head with new valves, gaskets, seals, relief bungs, etc. The only original components left on completion were the cams and crank. We began by completely disassembling the engine components and casings, followed by a thorough cleaning.
The cylinder heads were sent for specialist machining, while the main engine cases were painted, and the bottom end was prepared. After the Heads returned from engineering, we faced a major challenge in choosing the right cambelt to install, as there was no chassis number available to match it with. Most manufacturers and suppliers these days rely on either registration numbers or chassis numbers, both of which were not applicable to this engine.
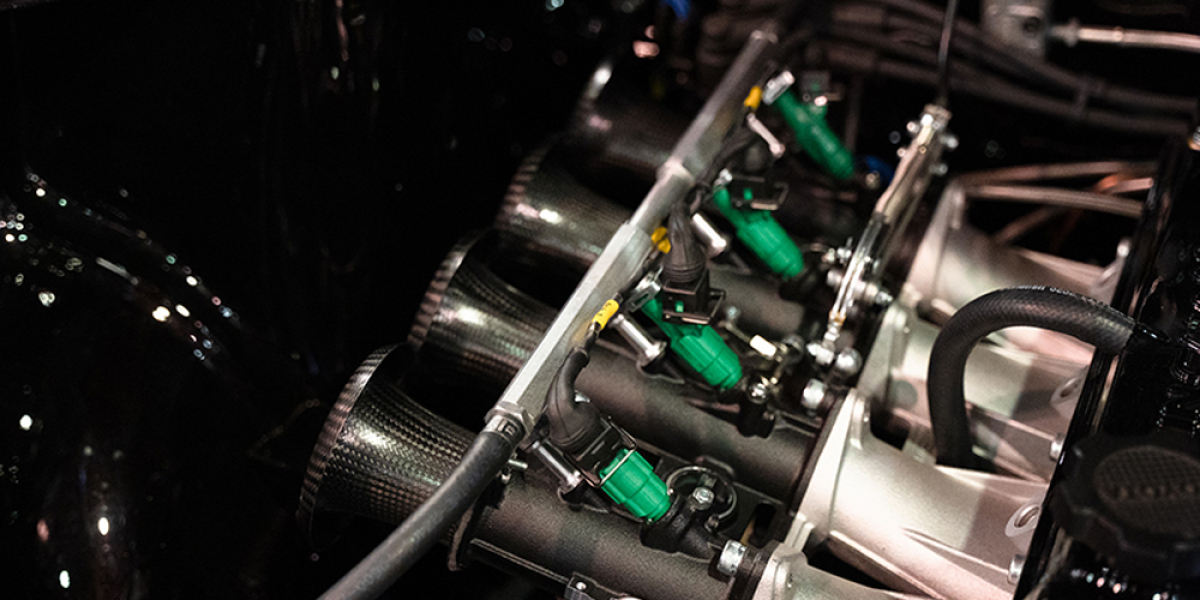
We did not have a cambelt to refer to since the engine was supplied stripped. We spent many hours on the phone with Toyota to figure out which cambelt to use, and initially, we had three options to choose from. After taking some measurements and doing some calculations, we decided to go with the most logical choice, hoping that our 95% compatibility would be sufficient. We purchased the Cambelt, Tensioner, etc. directly from Toyota and had to wait for it to be shipped from Japan. To finish building the engine, we installed carbon timing and top covers along with all new bolts. After applying a final coat of gloss paint, we then fitted the cambelt. Our vehicle underwent an upgrade to Jenvey ITB, which was completed by Northampton Motorsport.
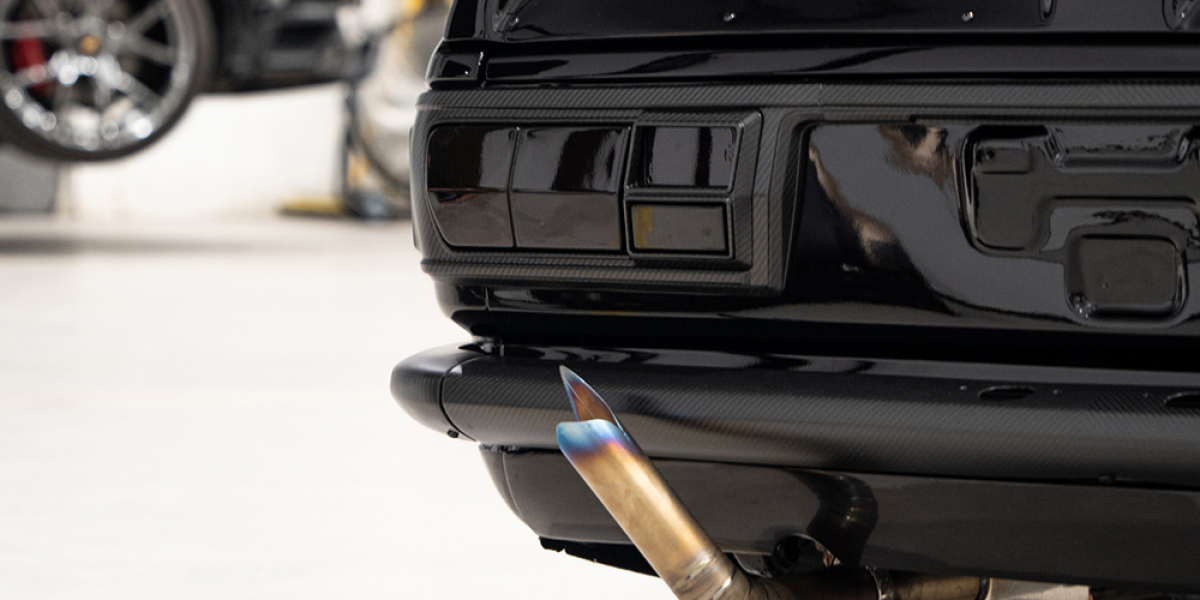
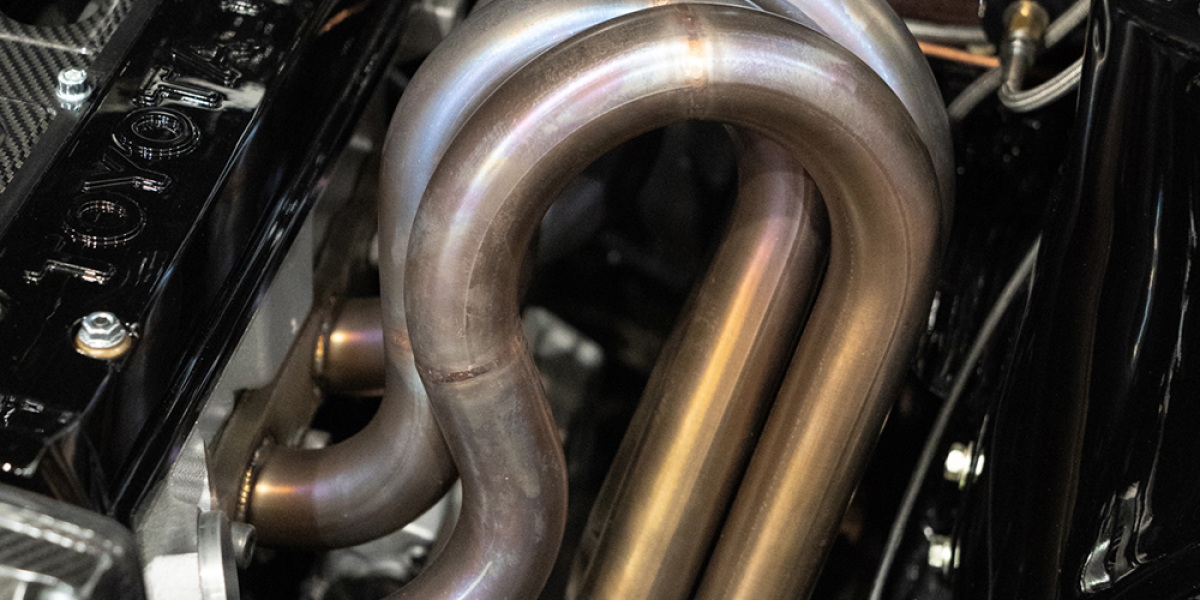
They also fitted the coil packs, upgraded the ECU, and tuned the engine for optimal drivability. The stock power of the vehicle with the plate number 4AGE was 110bhp. However, we dyno'd it to 147bhp. The kerb weight of the vehicle was 1500lbs and it had 118.1 Torq. Alpha Performance Fabrications crafted a set of headers using an upswept, equal-length design, made of 304-grade stainless steel, which were fully Tig welded and back purged. The headers are connected to a custom 2” exhaust system via a V band, with one silencer at the rear.
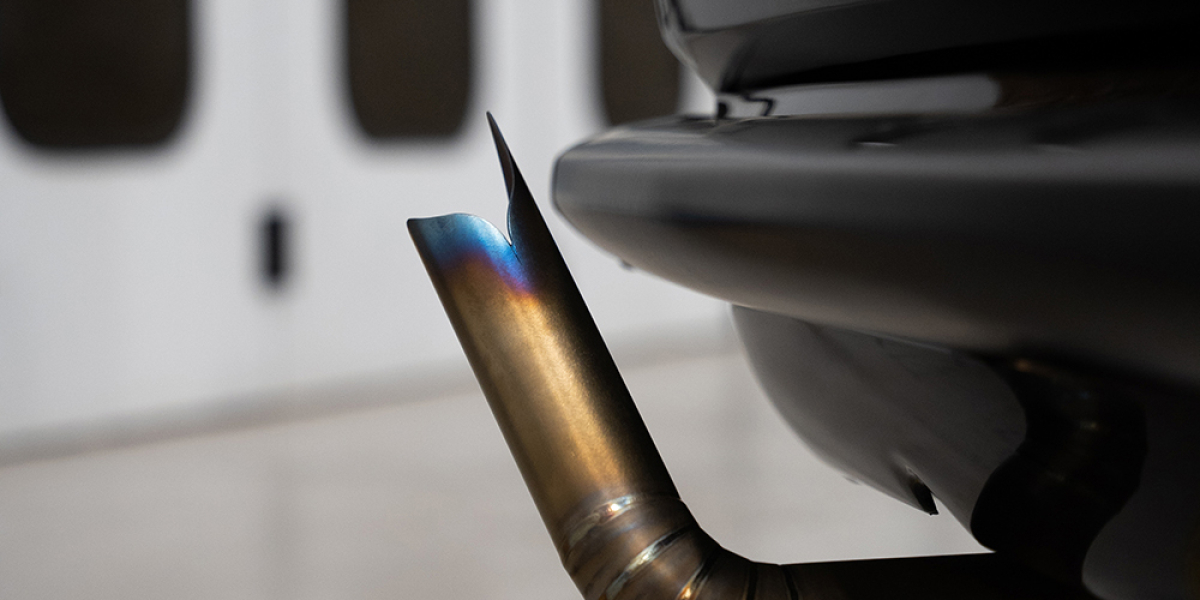
They also created a custom aluminium radiator with a Spal fan, which matches the original sizing and mount position of the previous radiator. Furthermore, an aluminium fuel tank was made and mounted in the boot. Two tailpipes were produced, one with an OEM-looking outward roll tip and the other with a completely custom, handmade tip which boasts a burnt teardrop effect. There were several other tasks involved in this project, such as creating a custom alternator bracket, installing the throttle bodies and linkages, and arranging to produce a bespoke prop shaft. There are too many small details to mention.
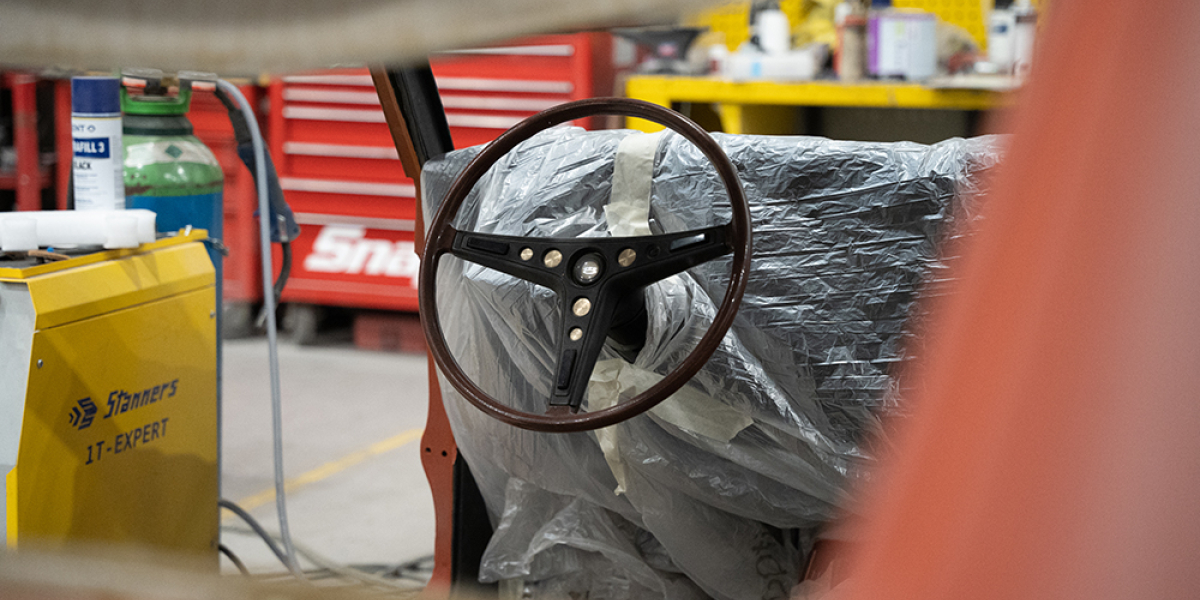
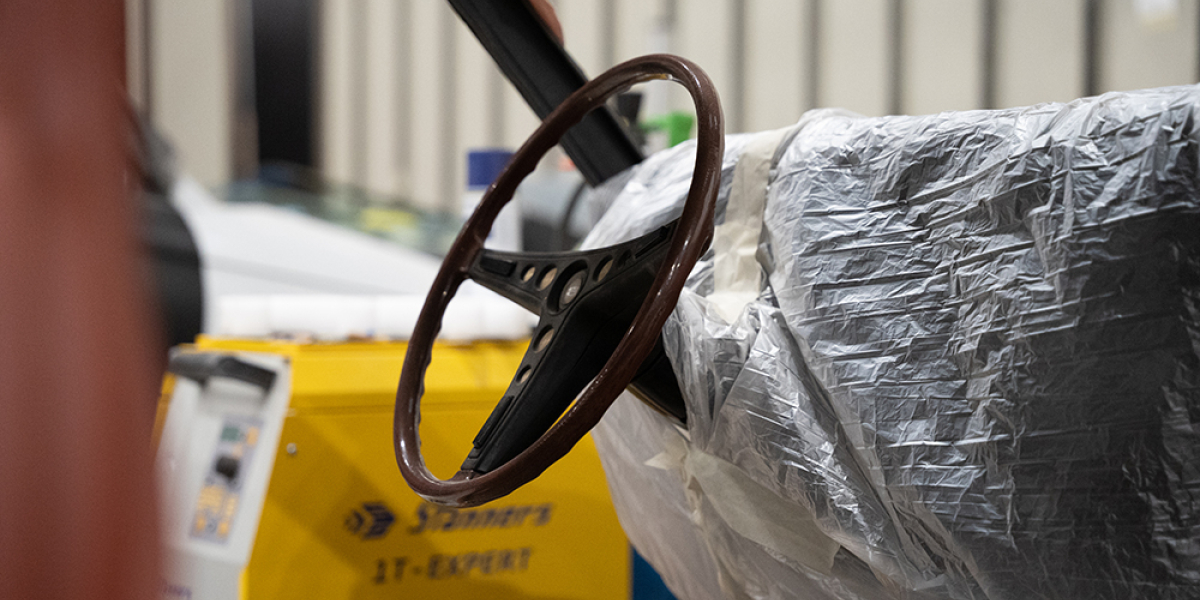
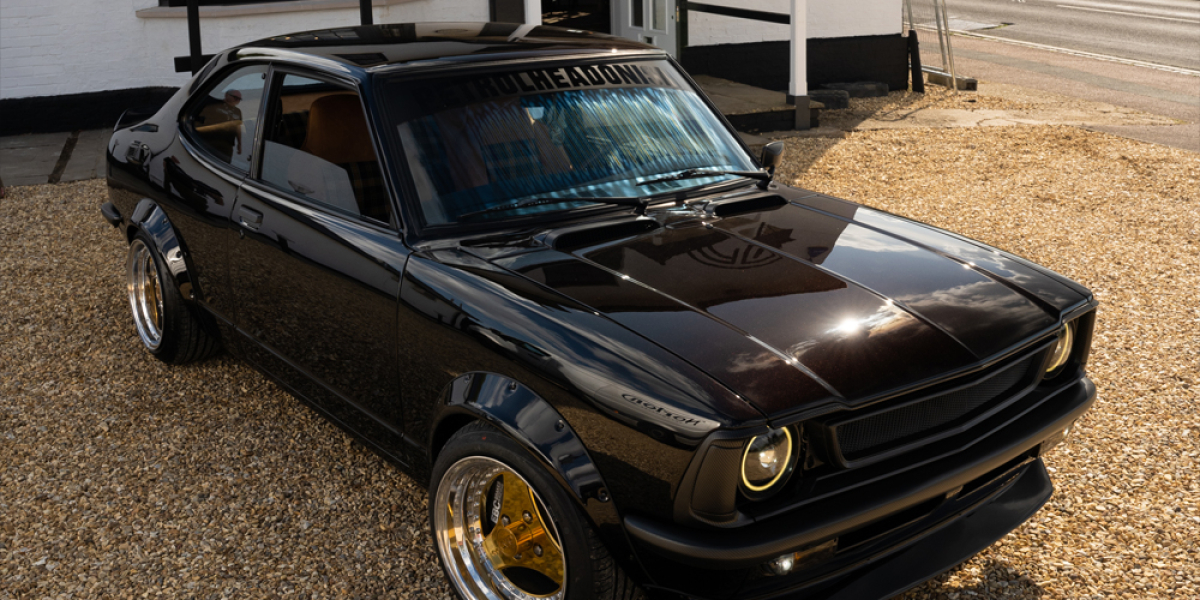
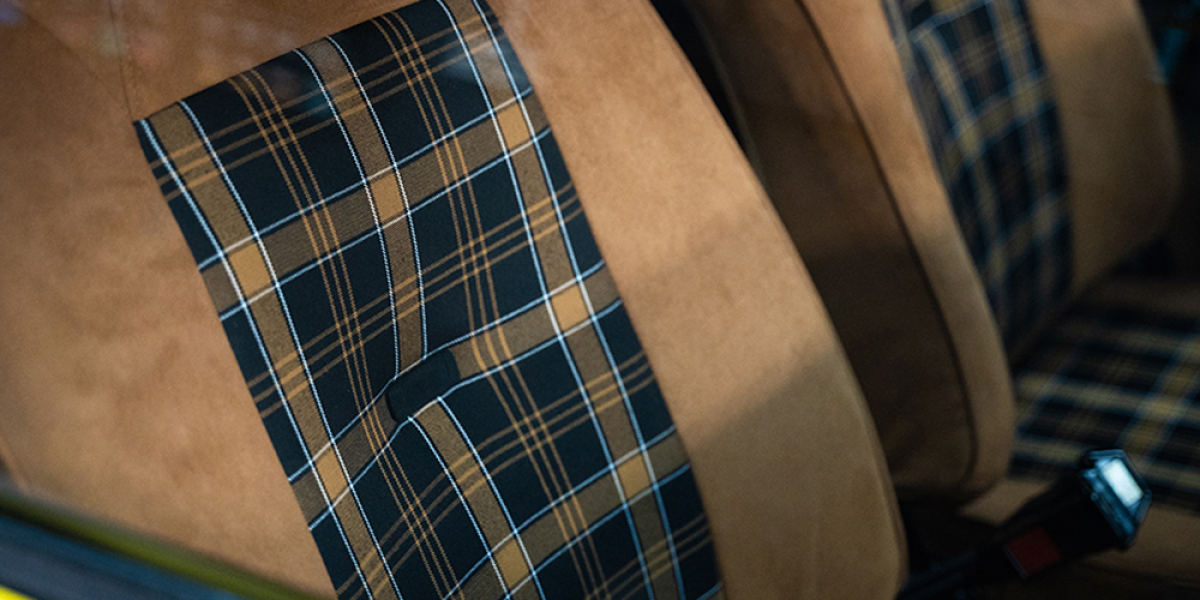
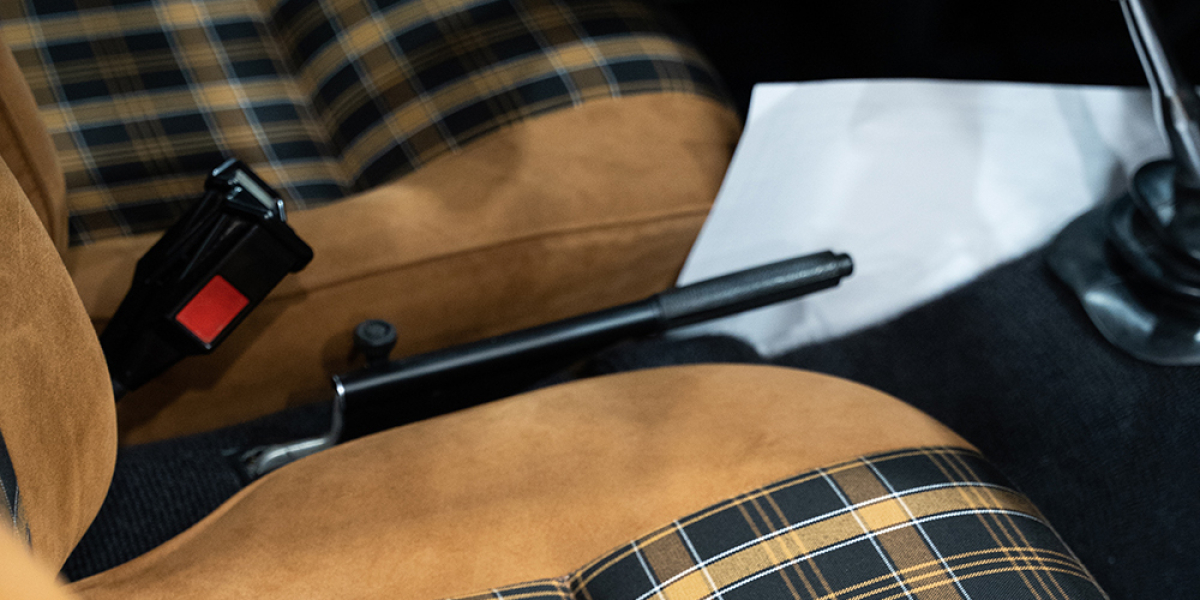
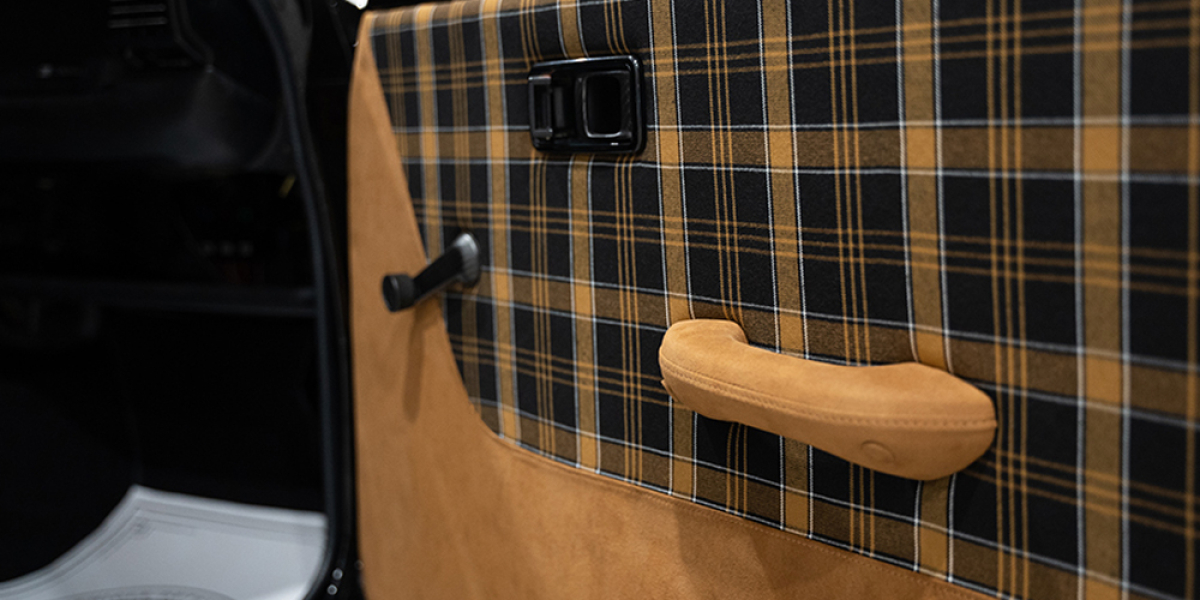
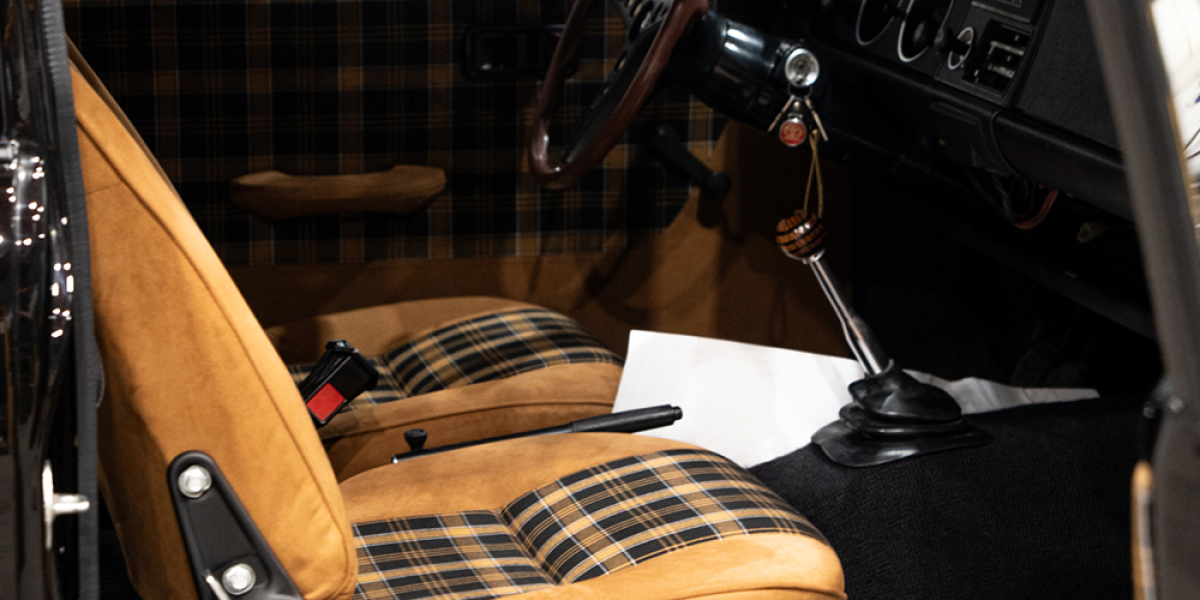
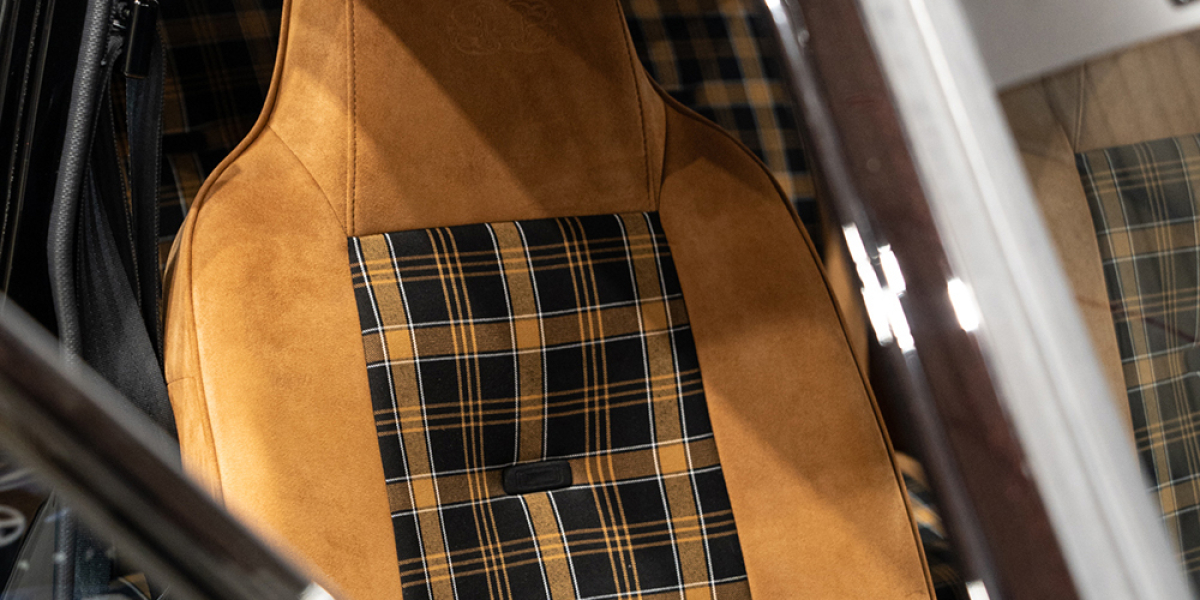
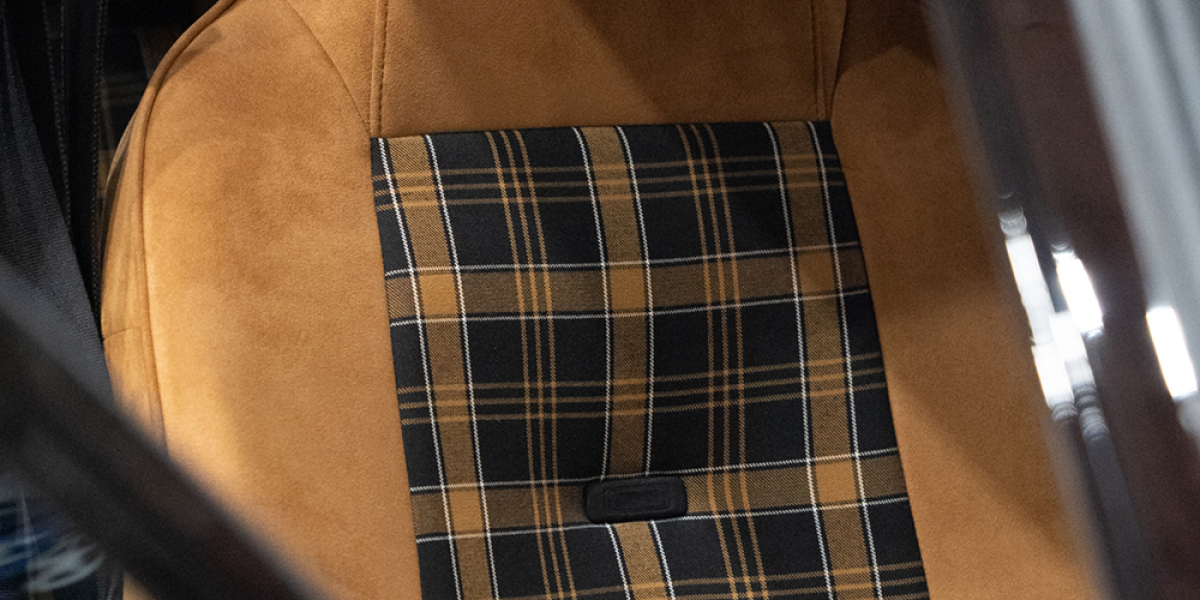
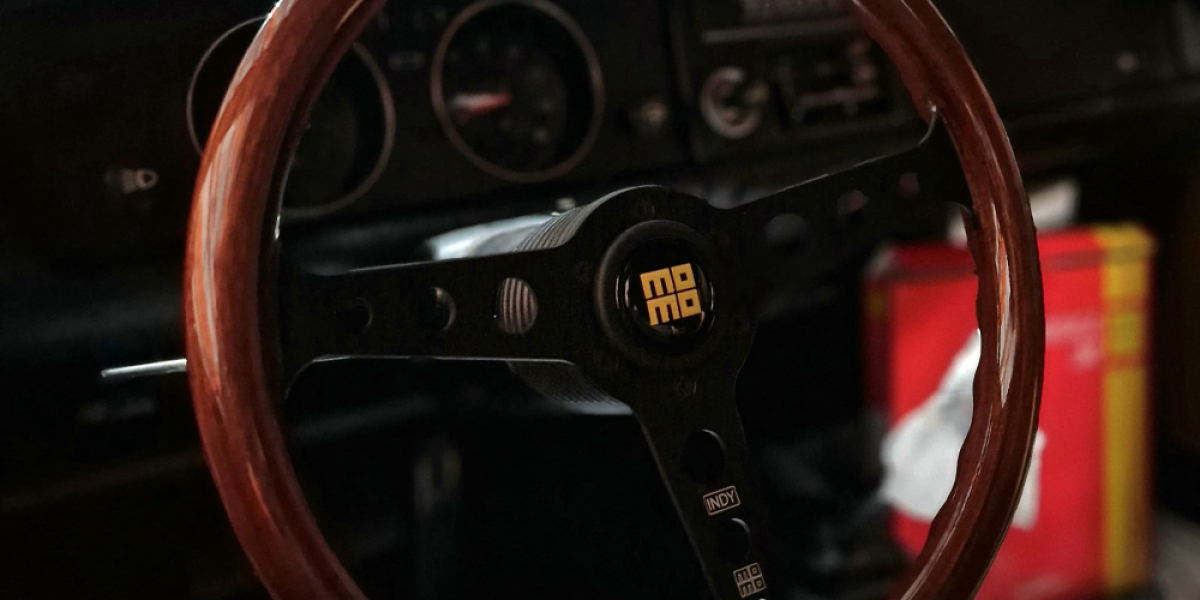
Interior and Dashboard: We aimed for a retro Porsche look for the interior of our car and got in touch with Dave The Trimmer from Bedfordshire, UK. While keeping the original interior intact, we opted for a complete Alcantara Retrim which included the headlining, seats, doors, and dash top. We also added some SOLM '72 tartan inserts to the package and finished it off with Box weave carpet. To give it a perfect touch, we got the original Toyota logo embedded into the seats. For steering we used a MOMO California Wood with a black center steering wheel.
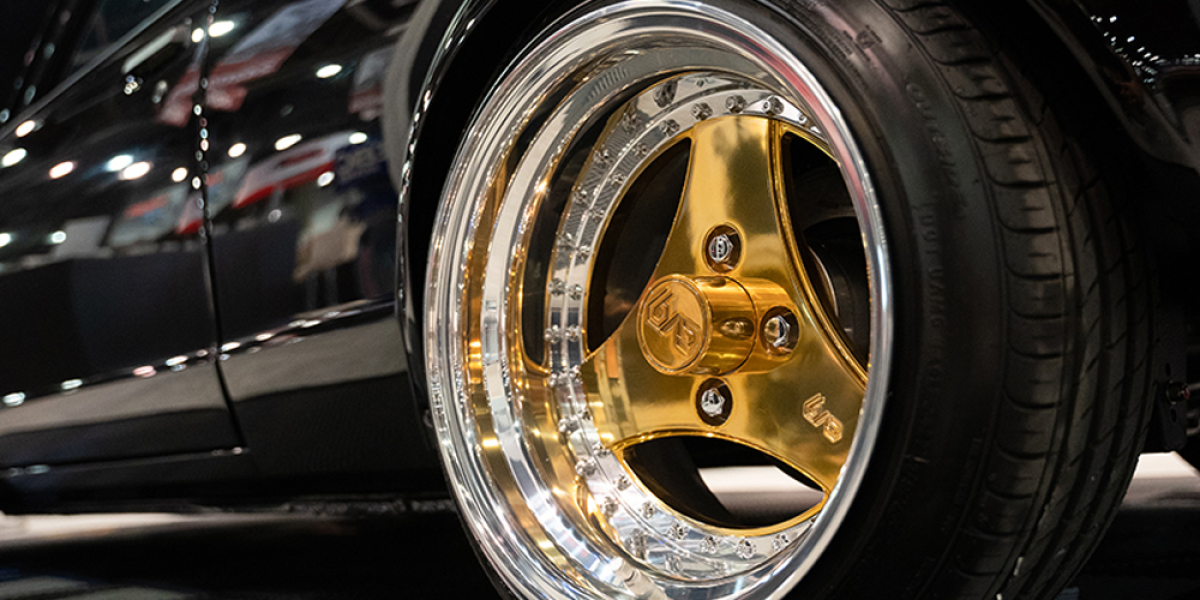
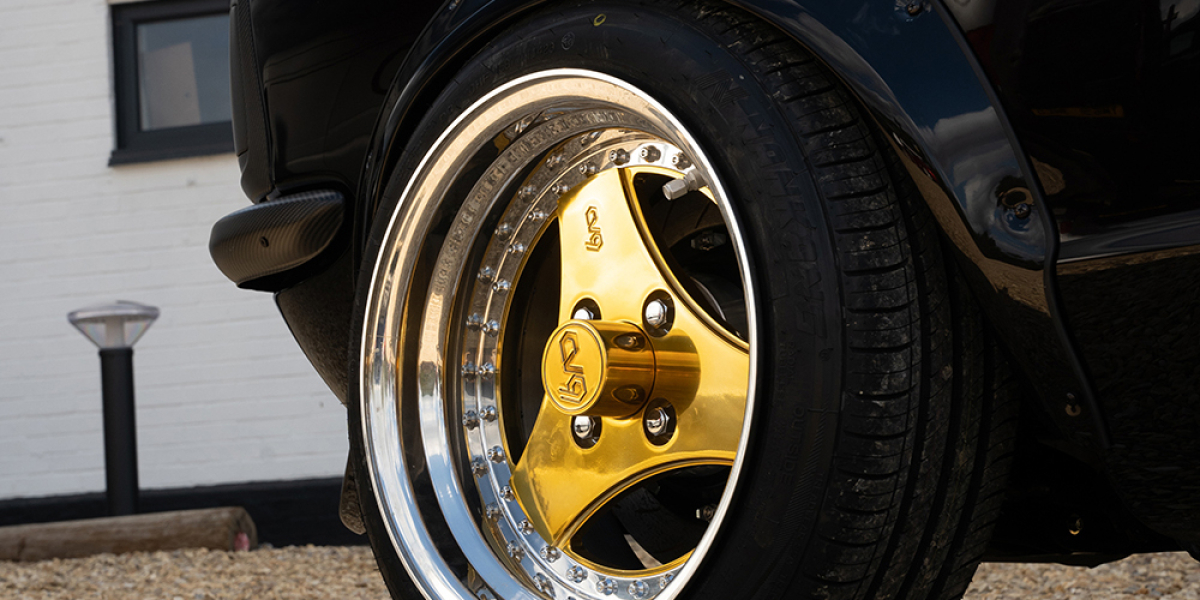
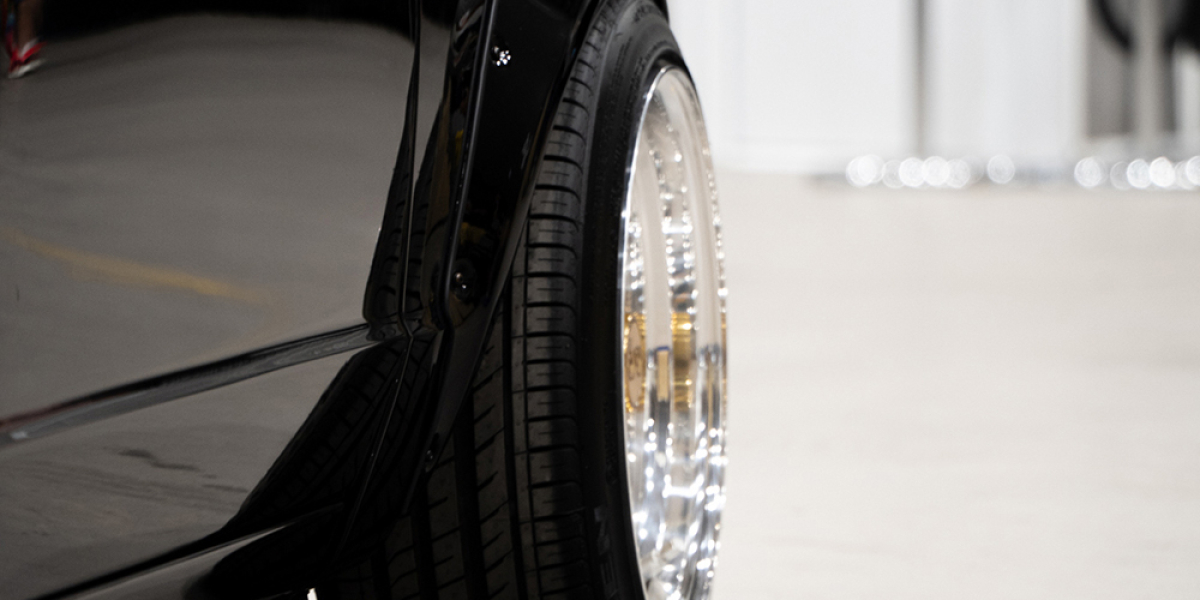
Wheels: For the wheels, we went all out with 6AD FORGED one-off three-piece 3-spoke wheels. These were finished in gold and chrome to give a retro, period throwback to the 70s JDM style, inspired by Advan 3 Spokes. The wheels were designed and created by the team at 6AD Forged UK and were wrapped in NEXEN Nfera Su1 195/45z/R15 Tyres.
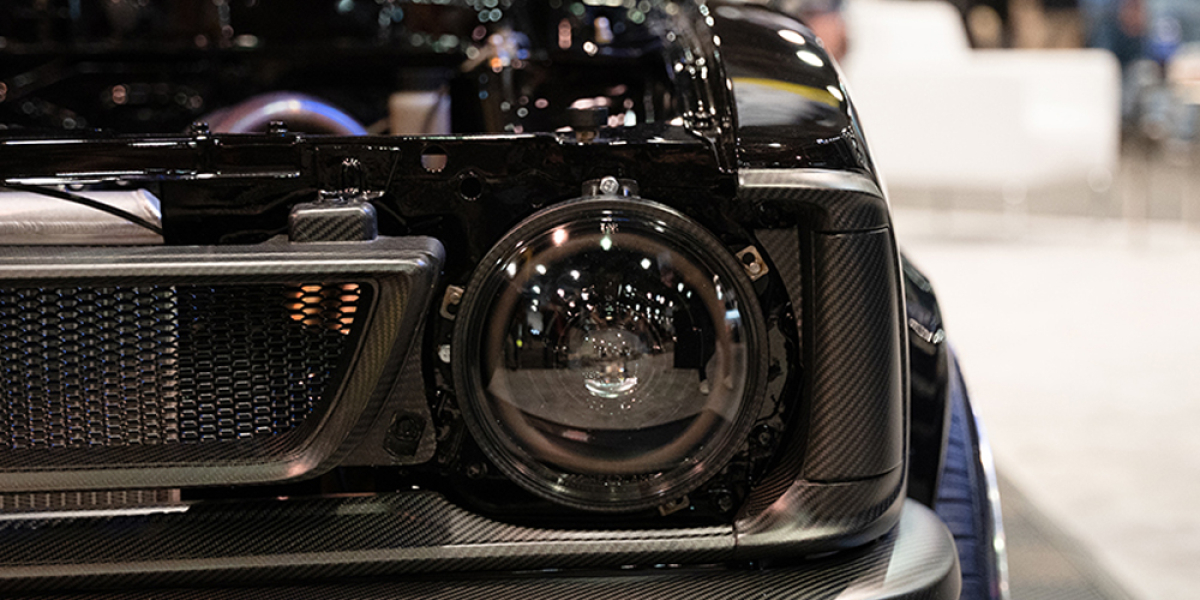
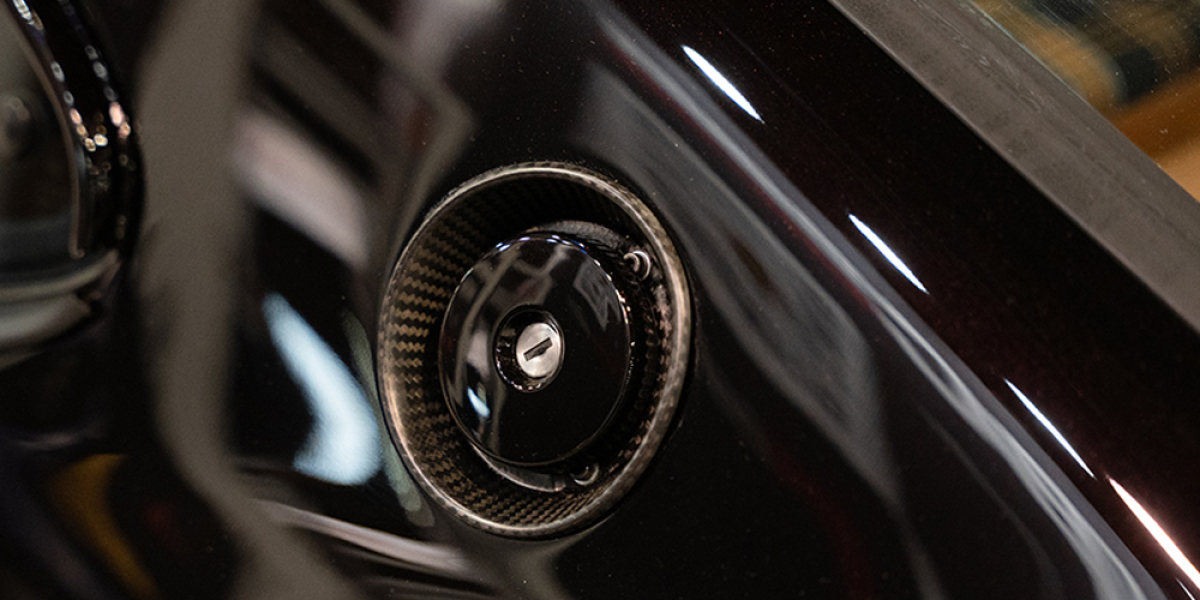
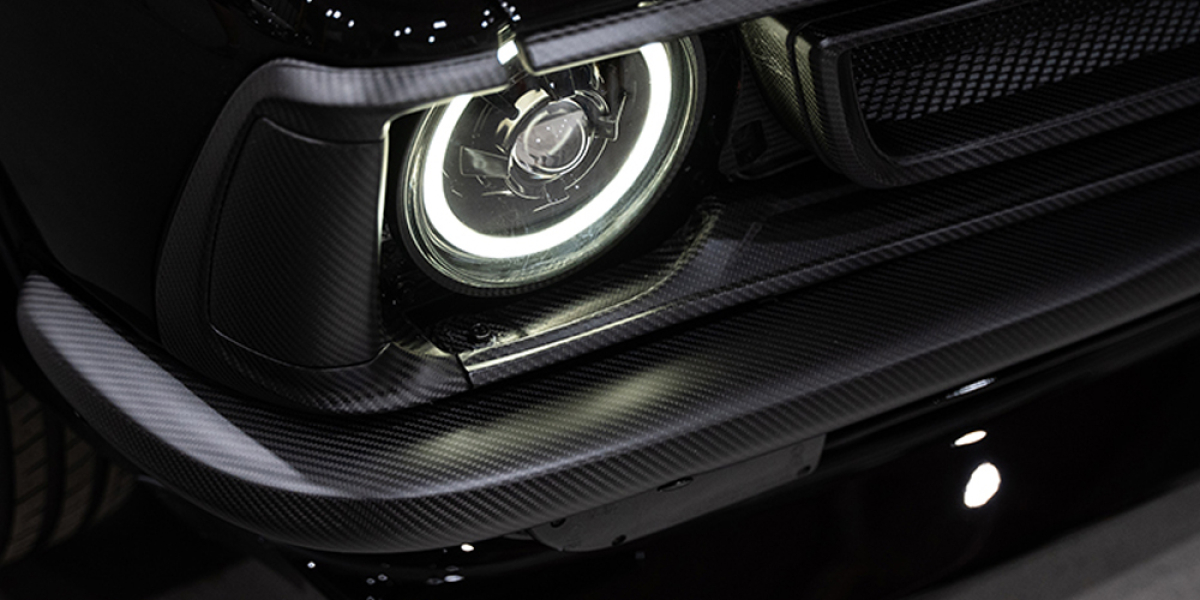
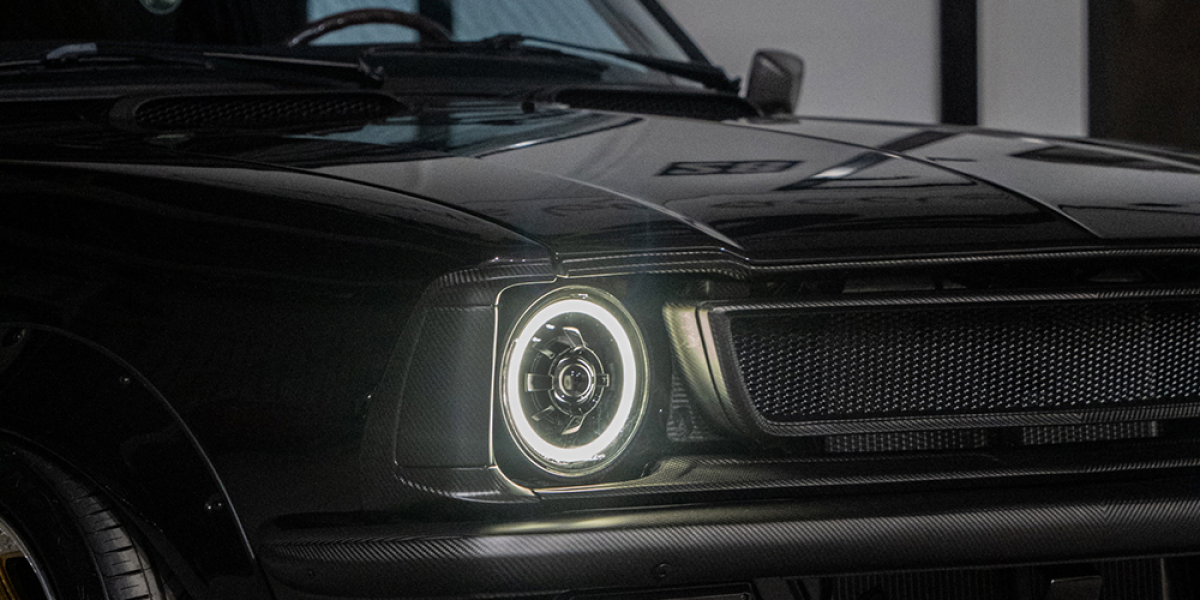
Dry Carbon replacement trim by Elite Carbon Composites: I initiated a project to revamp a vintage 1973 Toyota Corolla. What set this makeover apart was the utilization of carbon fibre, a material which I meticulously shaped to manufacture bespoke and exclusive components. These novel parts substituted the former chrome components, and I treated them with a luxurious satin lacquer to achieve a polished finish. The project demonstrated the incredible skills and creativity of carbon fibre experts. To restore the Corolla, the first step involved creating moulds from the original parts. This was a rigorous process that required extreme precision and attention to detail, ensuring that every curve and contour of the original parts was accurately replicated in carbon fibre.
The result was a masterpiece of carbon fibre craftsmanship. The process of creating the car's structure involved placing each layer of high-quality pre-preg carbon fibre into the moulds with great care and precision. The herringbone weave pattern that runs down the centre of the car is a true masterpiece. It is a testament to the dedication and skill of the team who handcrafted it with the utmost attention to detail.
Achieving the perfect balance between strength and visual appeal for these custom-made carbon fibre components required a crucial step in the manufacturing process, which was the curing. The components underwent the curing process in an autoclave, a high-pressure chamber under precisely controlled conditions of 90 psi (pounds per square inch) and 135 degrees Celsius. This controlled environment guaranteed that the carbon fibre parts emerged with the utmost structural integrity and a flawless surface finish.
Each carbon fibre component was tailor-made for this one-of-a-kind 1973 Toyota Corolla. After dedicating approximately 200 hours of work, every minute invested was a testament to my commitment to achieving perfection. The outcome of the full project was better than expected and showing it at SEMA was a true dream come true. Now we are starting our next build on a 1965 Widebody Fiat 500f with a Ducati engine swap.
We would like to thank:
- EBC BRAKES UK
- PENNINGS UK
- ELITE CARBON COMPOSITES
- ALPHA PERFORMANCE FABRICATIONS
- PETROLHEADONISM PERFORMANCE
- 6AD FORGED UK
- BC RACING SUSPENSION
- DAVE THE TRIMMER
- NORTHAMPTON MOTORSPORT
- DAPPER LIGHTING